I actually wrote this article exclusively for „Macfilos„, but came to the conclusion that it is also suitable as an addition for my website. Strictly speaking, it is a tutorial. I have recently written quite a bit about infrared photography, but I haven’t yet explained exactly how it works. I will make up for it here. An article in English will remain the exception. The main language of the website will continue to be German.
Working with invisible Light
Introduction
To claim that infrared photography is „as old as the hills“ would probably be an exaggeration, but it has been around for a very long time. The American physicist Robert W. Wood published the first infrared photography in 1910.
It uses the light of the „near infrared spectrum“, which is immediately adjacent to that of visible light, about 700 to 1000nm wavelength.
I could see each colour of the rainbow in the white light, and, at the very edge of the spectrum, an eighth colour I had no name for.
Stephenie Meyer, „Breaking Dawn“
In the fourth volume of the „Twilight Saga“ heroine Isabella Swan wakes up transformed into a vampire and makes the observation quoted above. So vampires can „see“ infrared. This makes morbid sense considering their warm-blooded prey.
The human eye cannot perceive the infrared wavelengths. So unless you suddenly feel a strange urge to drain people of blood, you need other tools to gain access to the world beyond visible light.

Certain types of film are sensitised to this area. There are „pure“ infrared films (which are quite „tricky“ in use) and films that have a correspondingly extended range beyond the visible spectrum, e.g. the Ilford SFX200, which can also be used like a „normal“ black-and-white film.
Digital sensors are equally sensitive to infrared light and this is quite undesirable because it blurs the images. That is why there is an infrared blocking filter in front of each sensor.
In this context, a small birth defect of the Leica M8 immediately comes to the mind of the Leica expert. Its infrared filter is too weak, which results in black areas appearing purple and therefore additional IR-cut filters are needed in front of the lens. This misjudgement of the designers, however, makes the camera capable of being used for infrared photography without any modifications. Most digital cameras have to be freed from the filter in front of the sensor by special companies.
Even the first Leica monochrome (based on M9) not only has no Bayer filter, an infrared filter is either very weak or probably not present at all. This is also true for the M246 and the M10-M. The monochrome series is therefore predestined for infrared photography.
In order to take photographs with infrared light, an infrared pass filter must be screwed in front of the lens to block visible light.

The special appeal of infrared photos
I am fully aware that I am treading unsafe ground here, because whether one likes photos with infrared light is a question of personal taste.
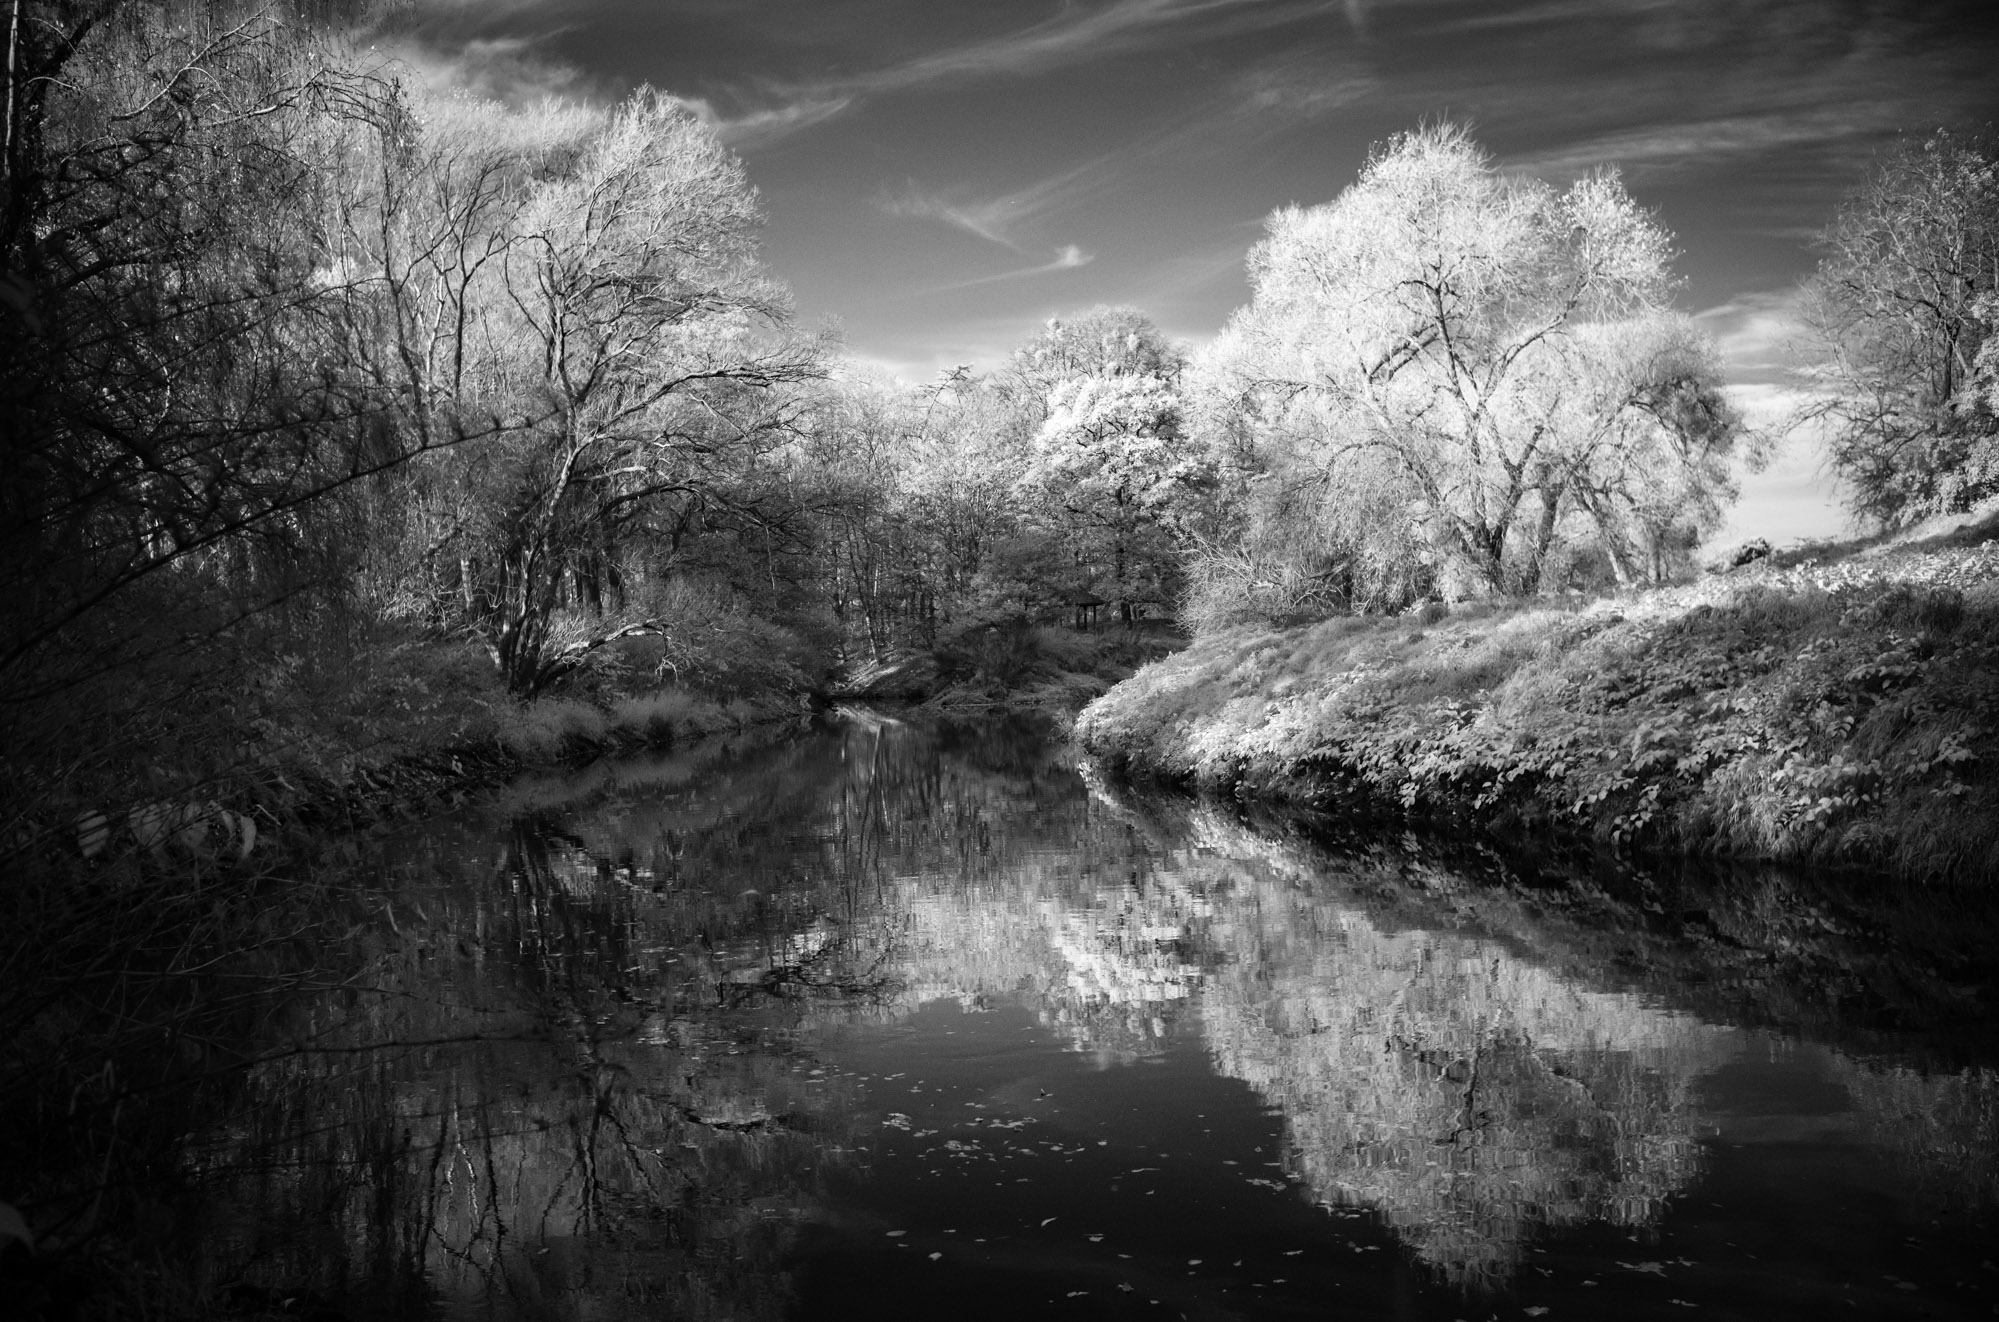
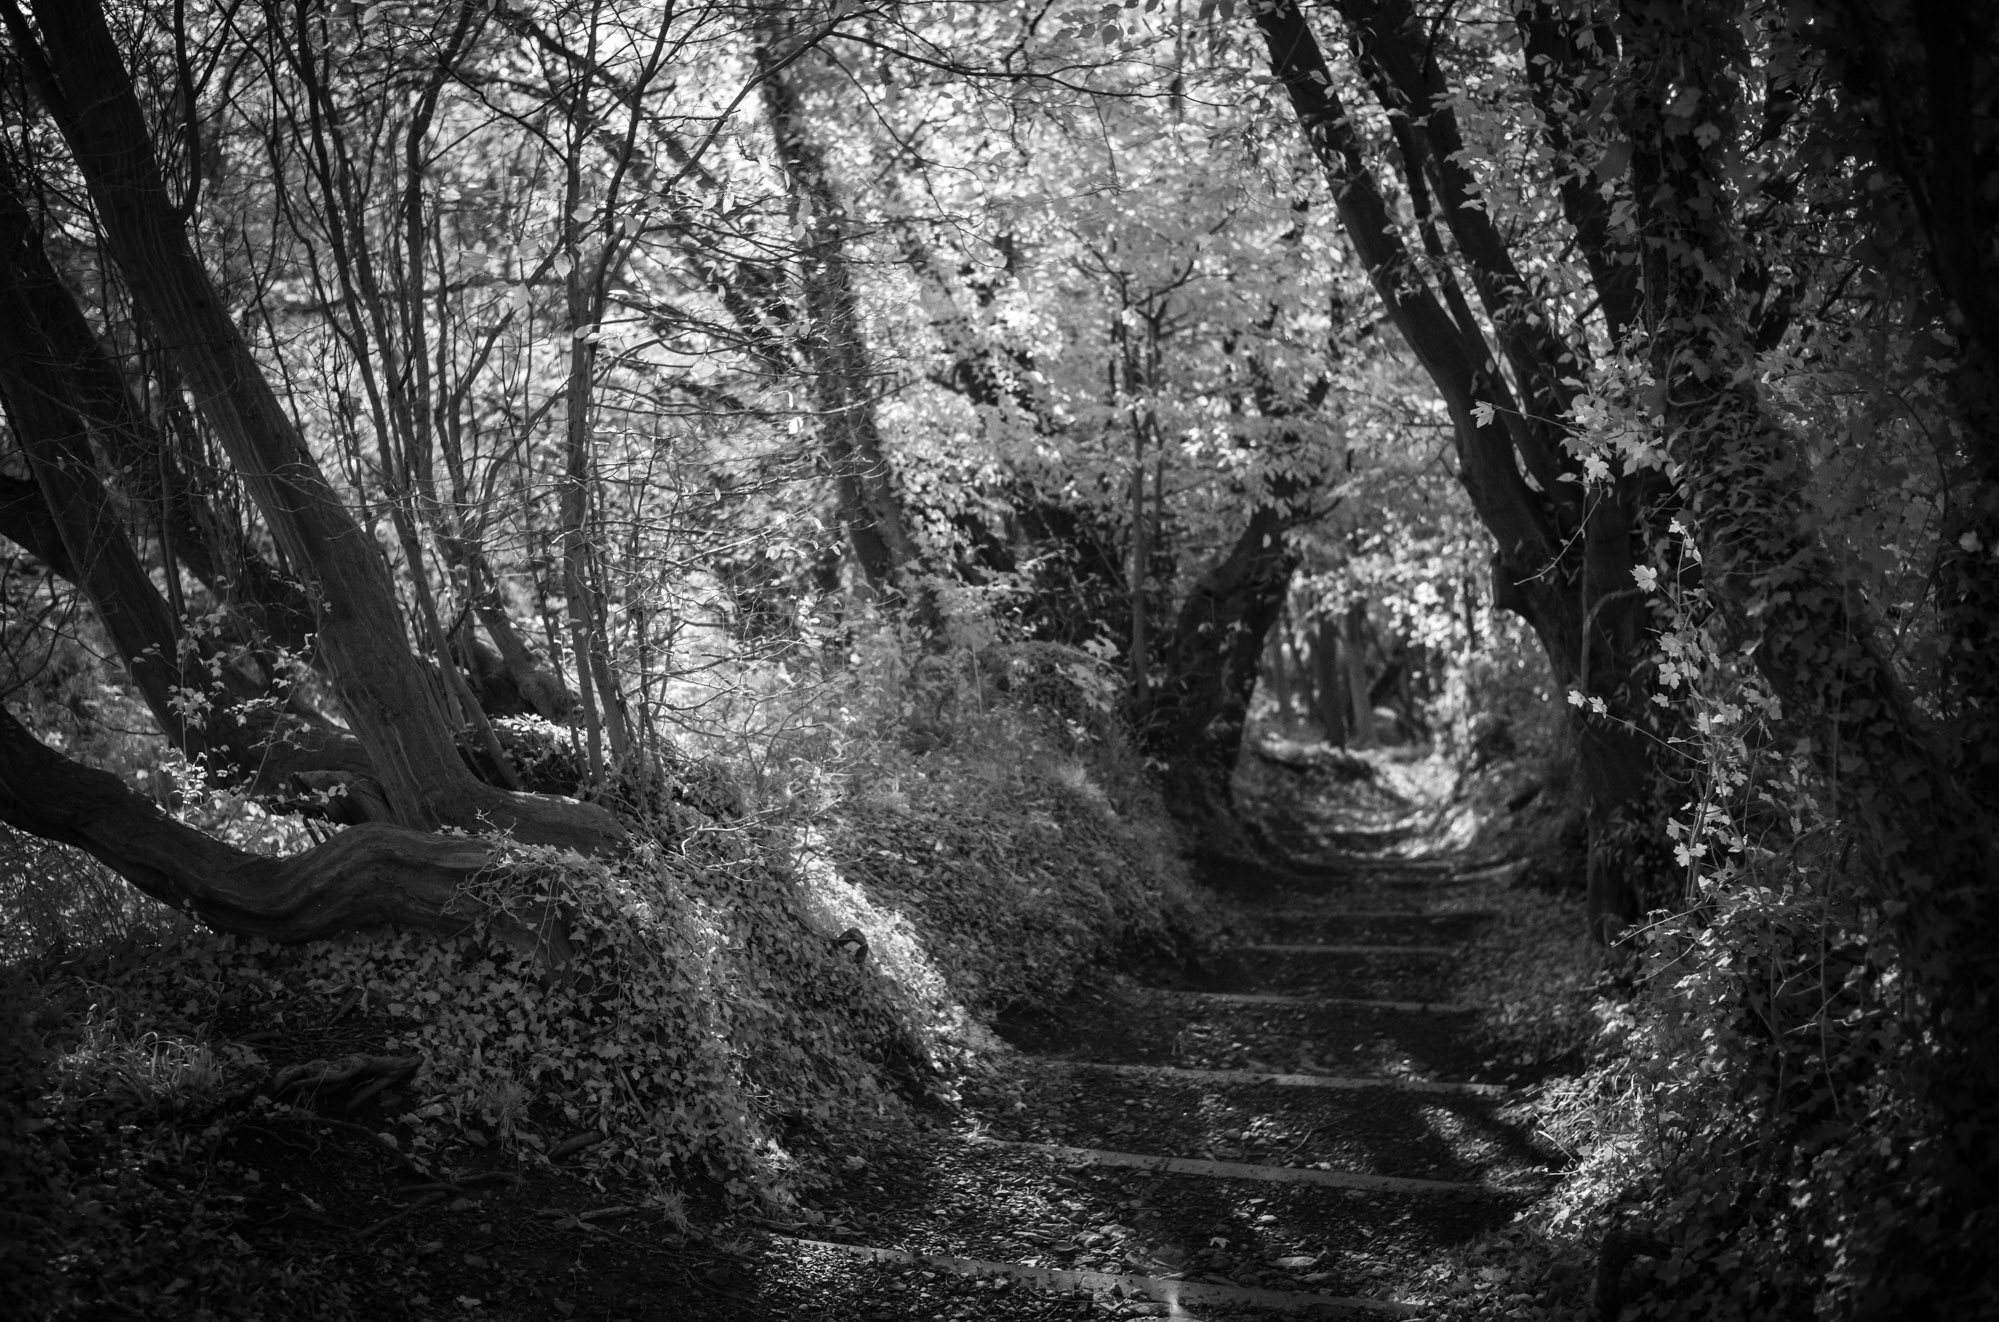
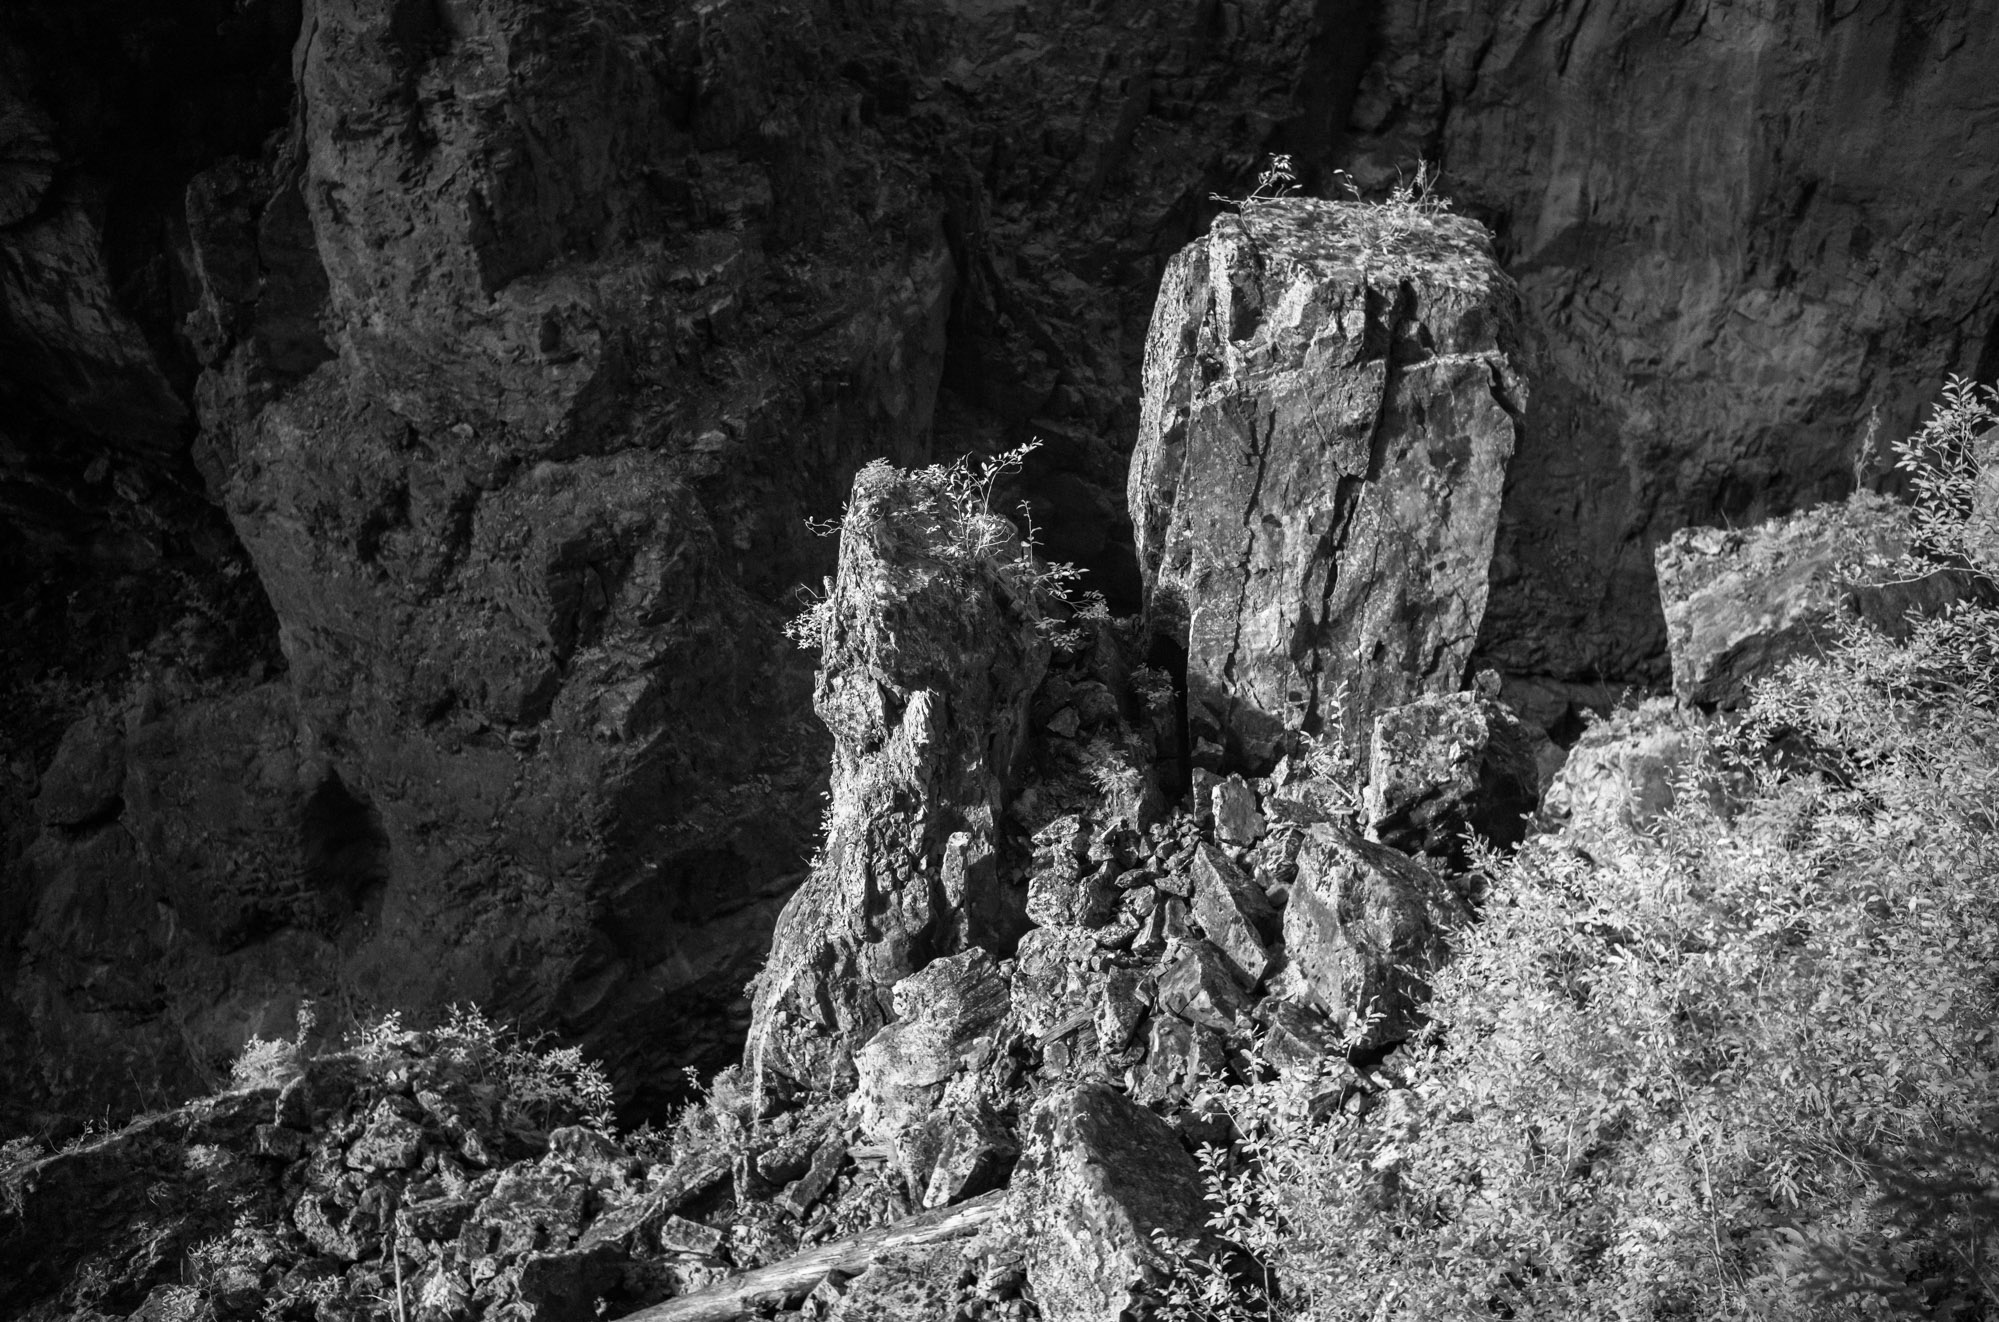
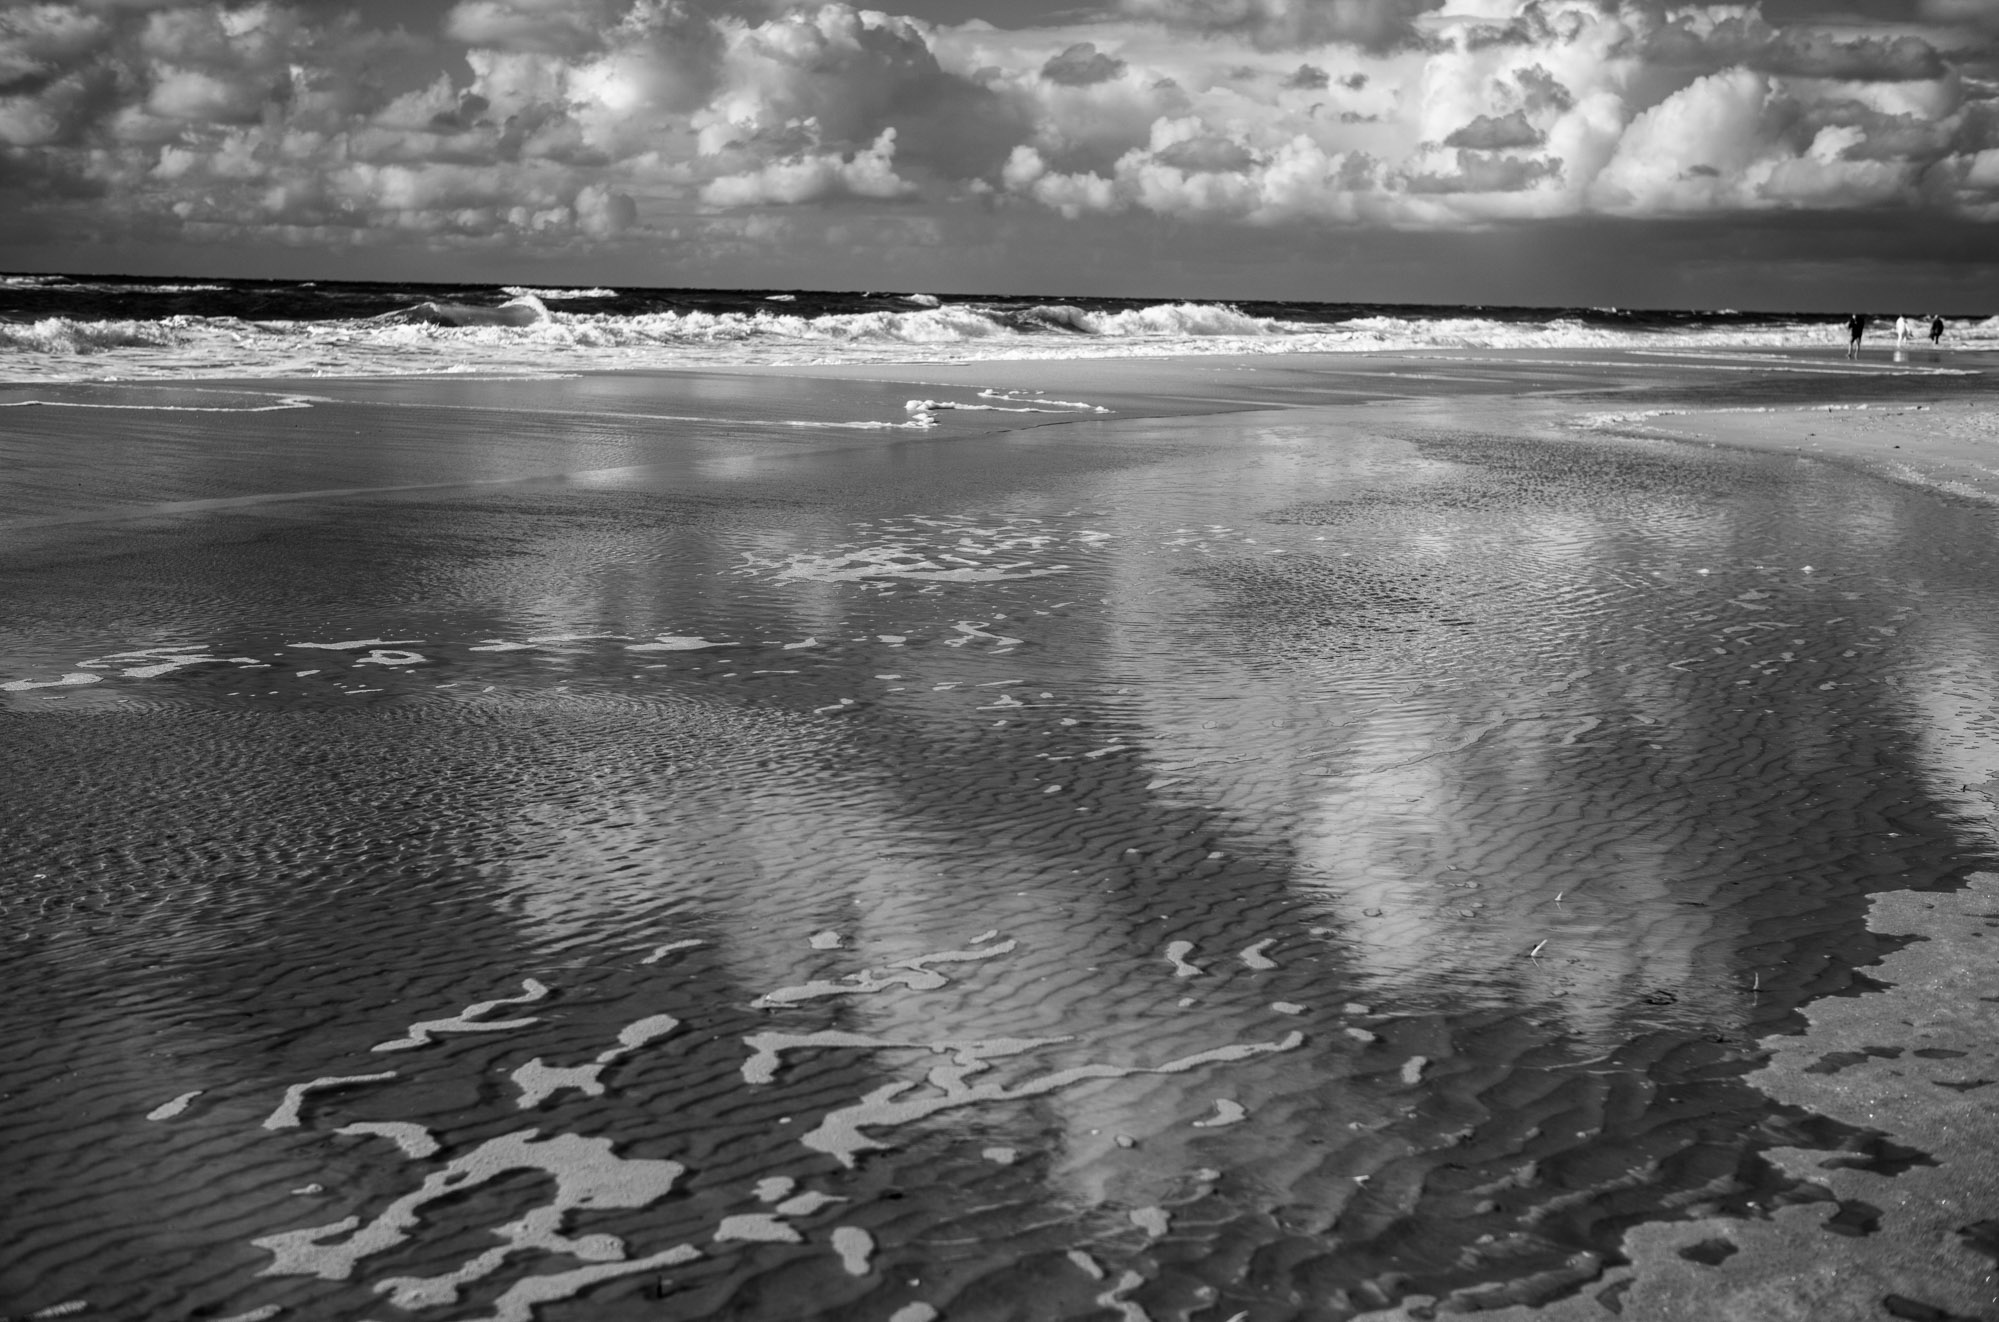
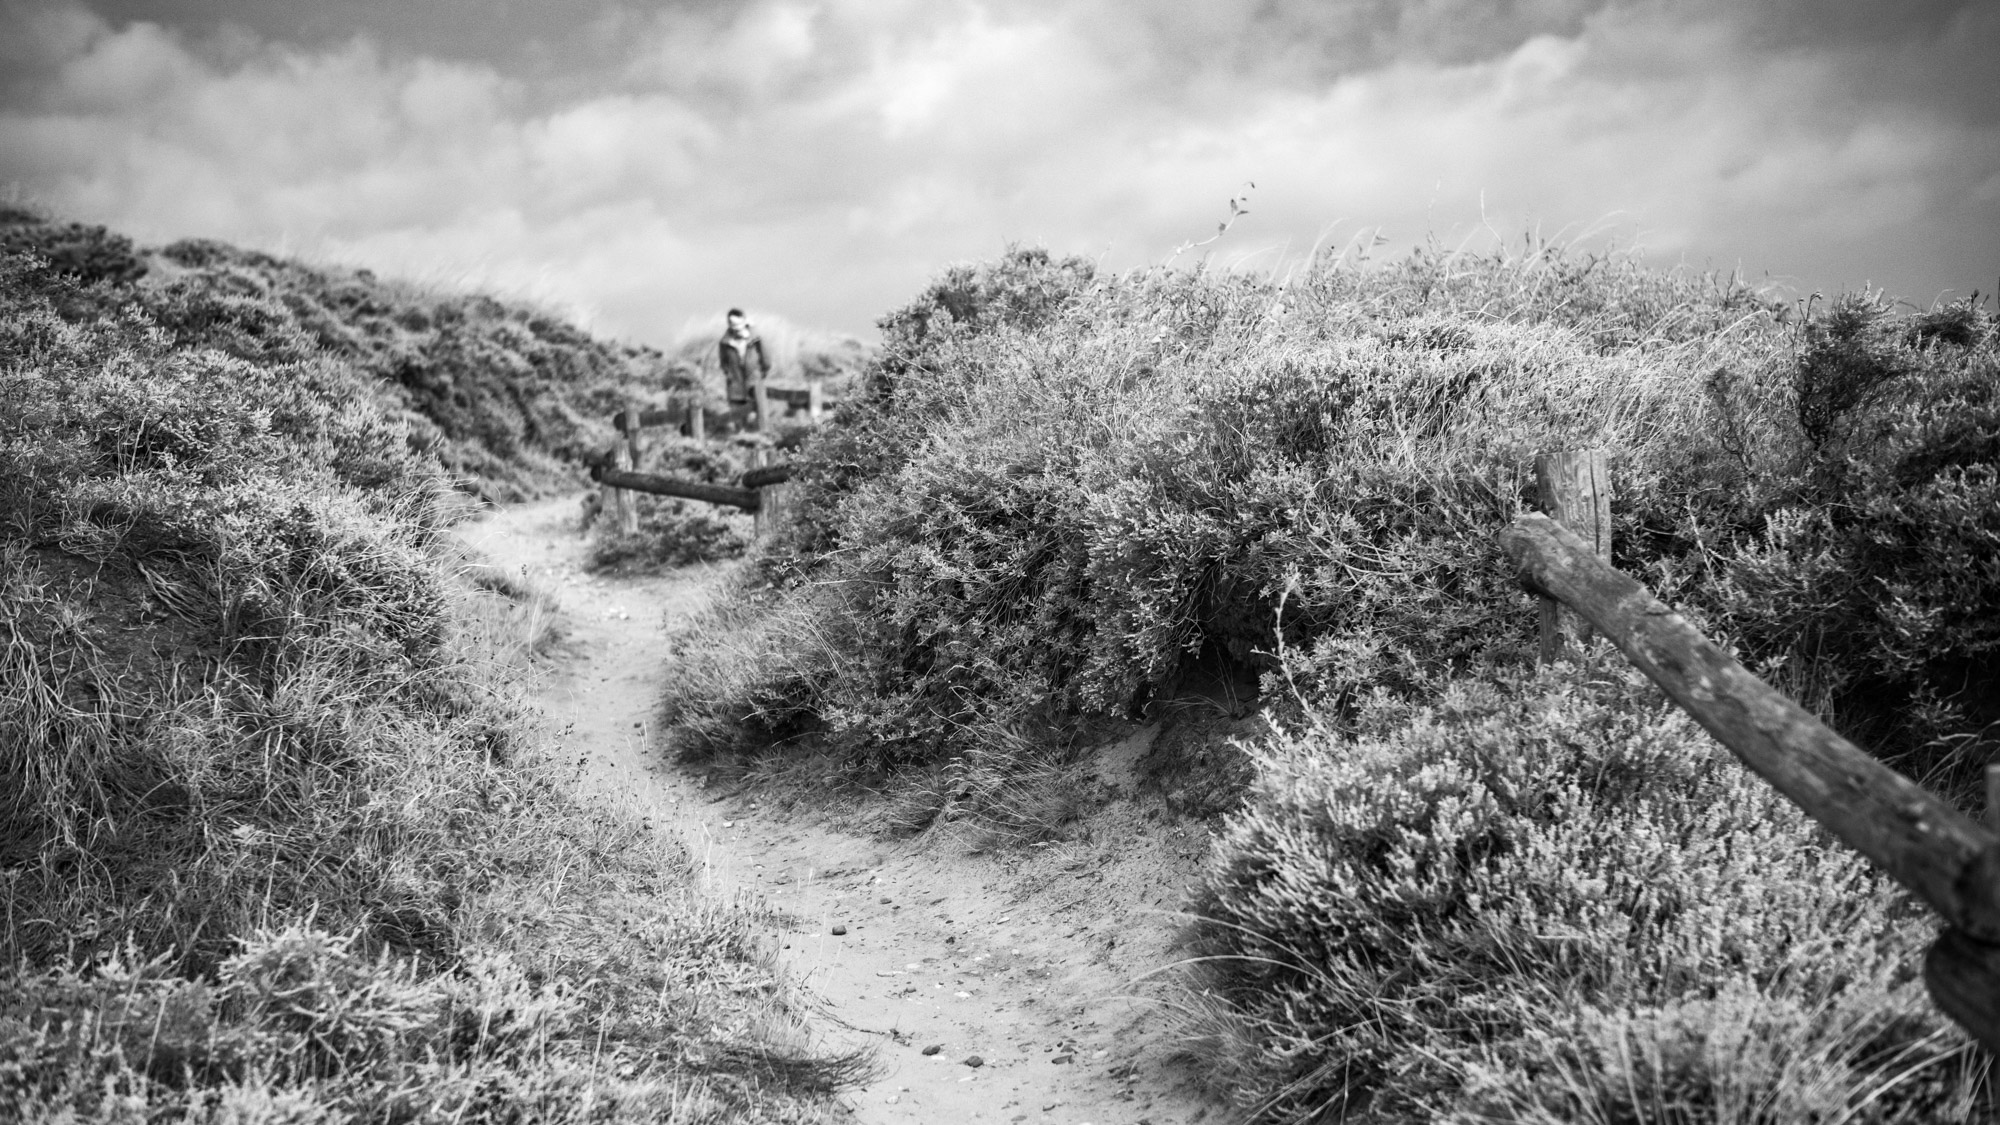
I find them pretty cool. There is something surreal about them, with the dark sky and extreme cloud contrasts, the white foliage of the plants and black water surfaces. How does the effect come about?
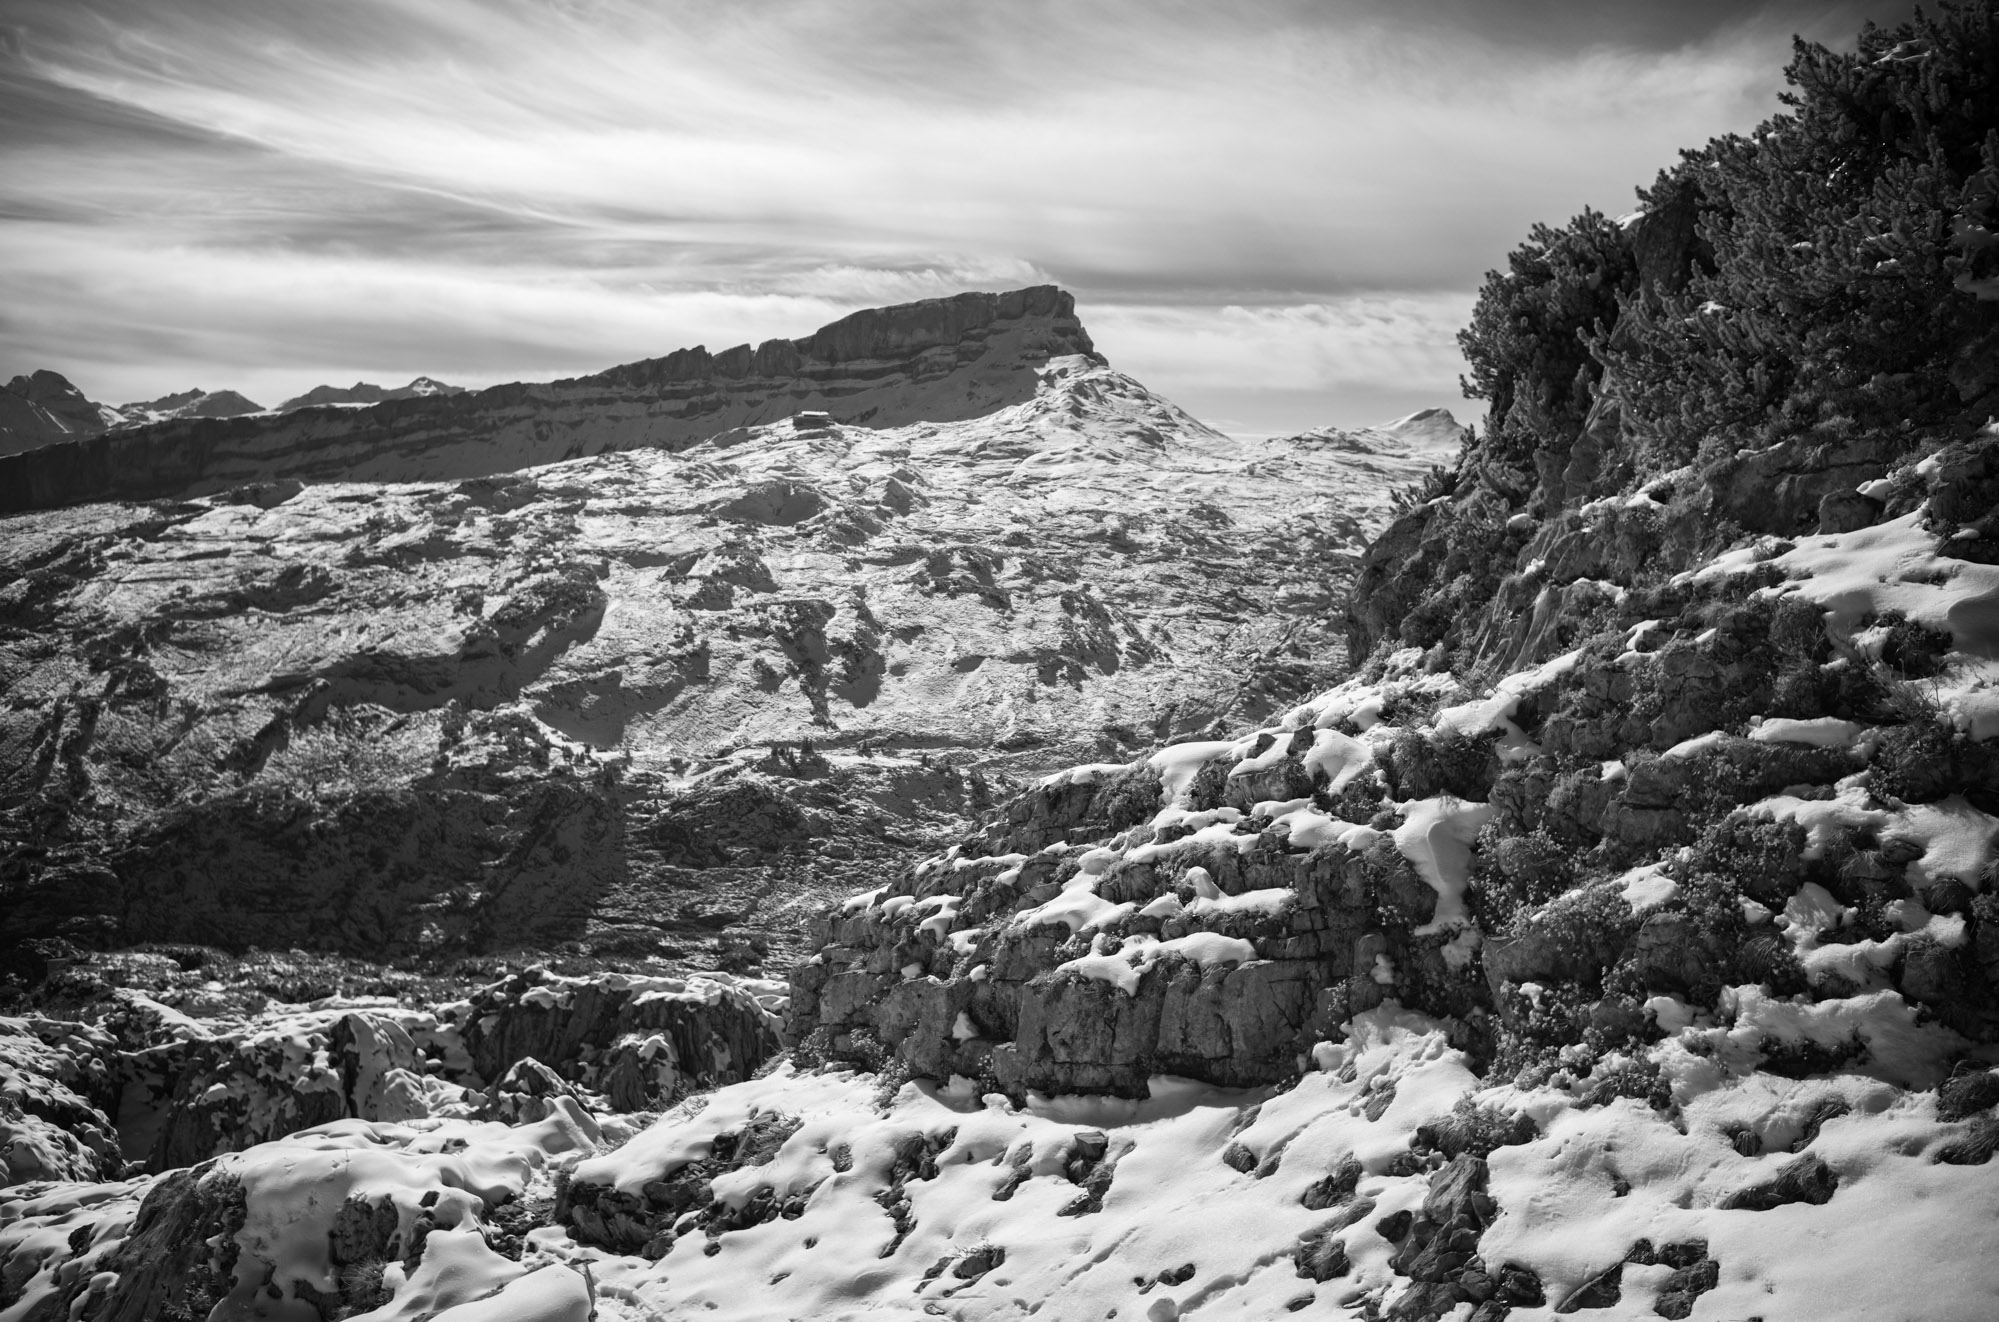
Infrared wavelengths are scattered by haze and air pollution to a lesser extent than visible light. Without such visual impairments objects are therefore easier to recognize in the infrared range than in the visible light range.
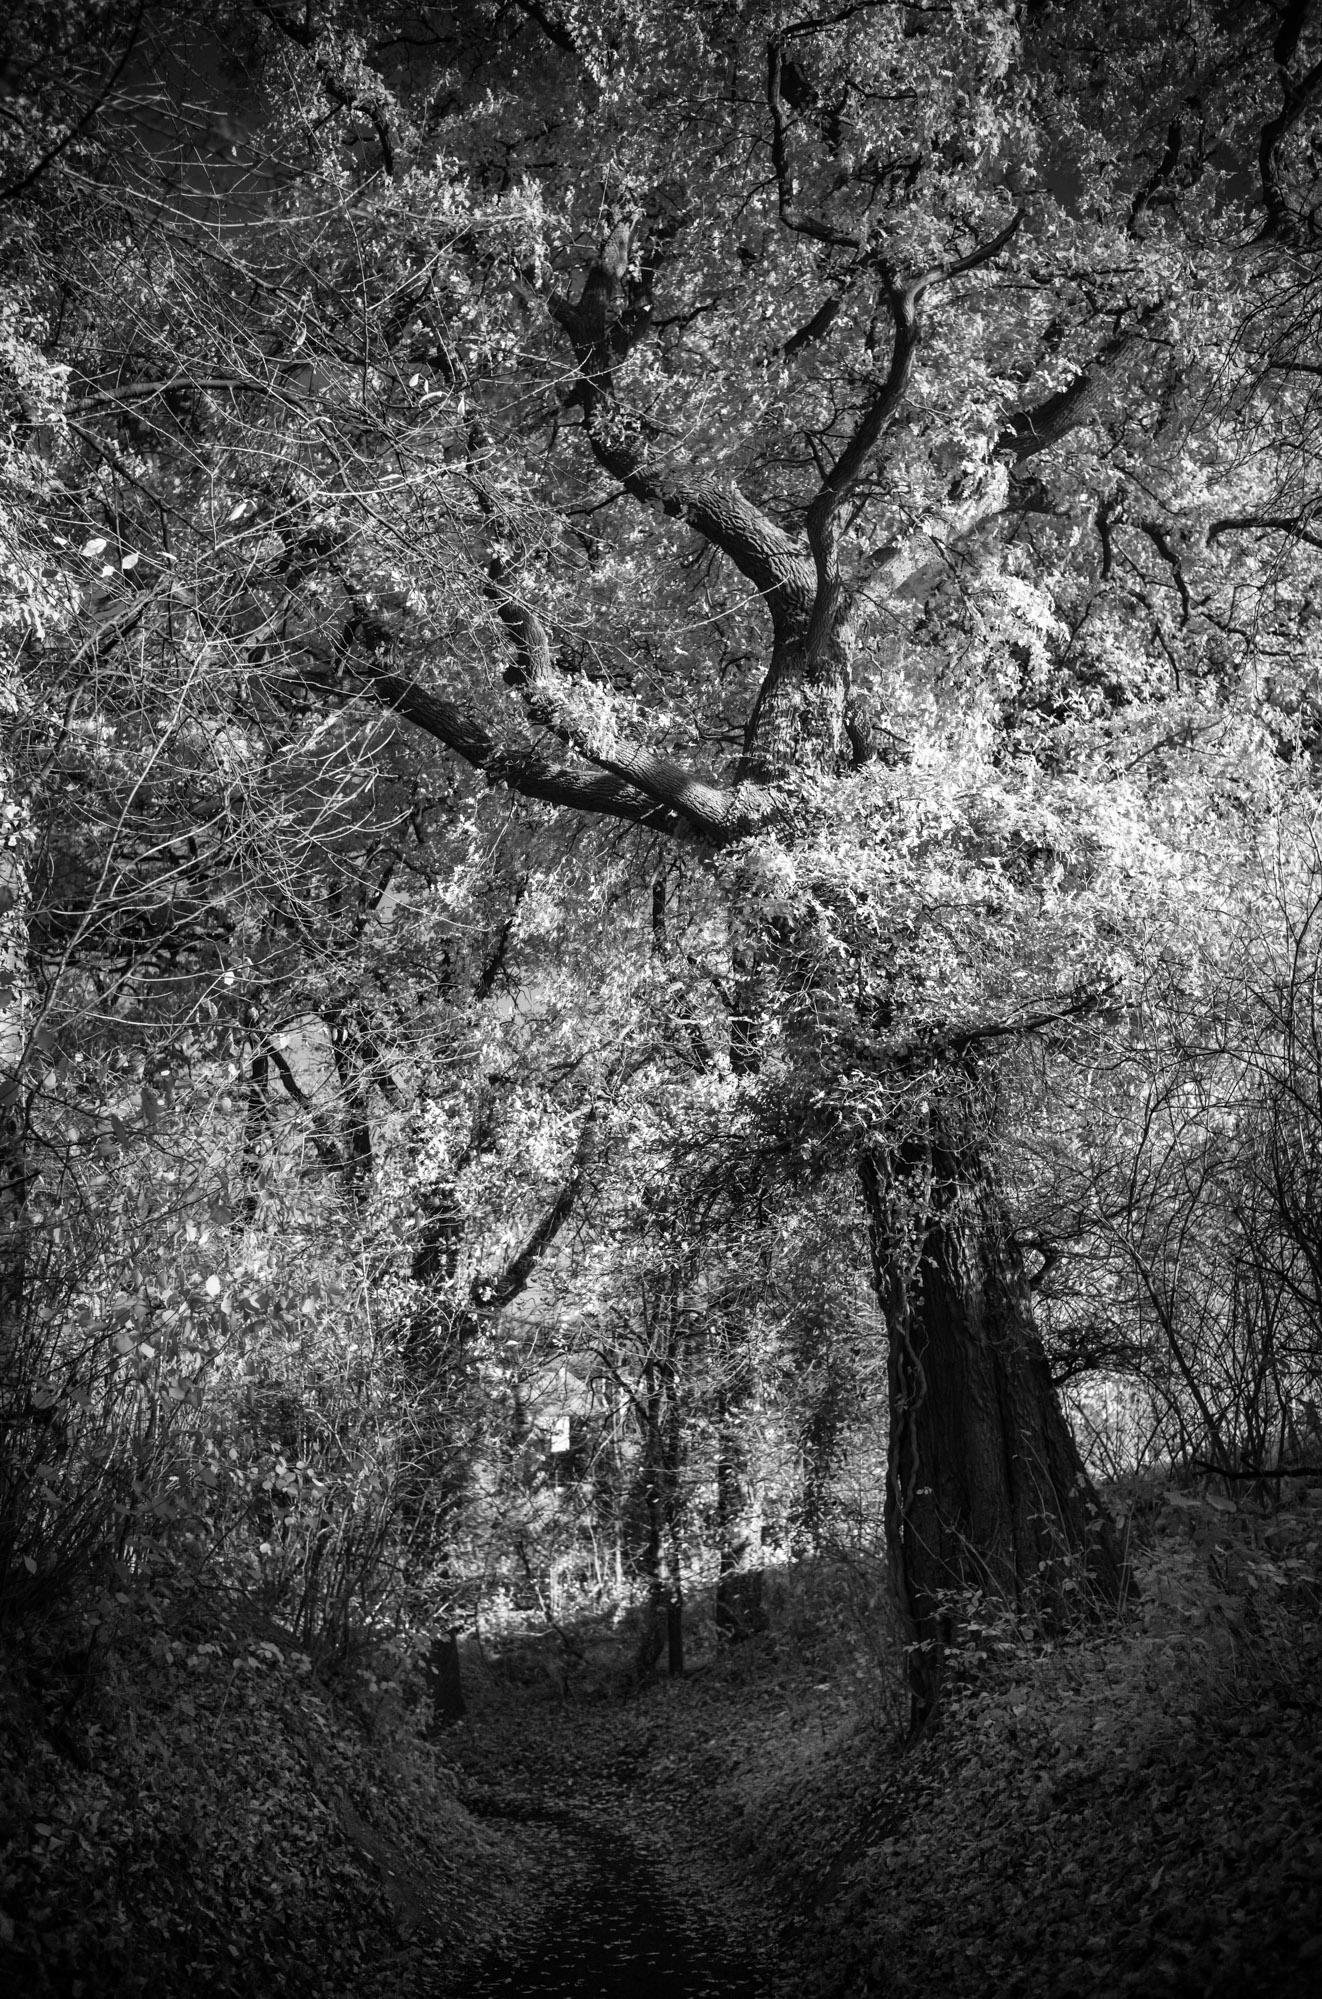
The objects photographed also have different reflective properties than with visible light. The „Wood Effect“ (named after its discoverer) is particularly well known. It refers to the special ability of chlorophyll to strongly reflect infrared radiation. It therefore appears very bright in the photos.
It is a sad truth of human history that when new scientific knowledge is discovered, there is always someone who immediately derives a military benefit from it. Infrared photography has been used for aerial reconnaissance since World War I, as enemy positions covered with camouflage nets stand out excellently from normal foliage.
But already in the thirties photo enthusiasts recognized the aesthetic effect of infrared images. Ilford and Kodak produced various films suitable for this purpose.
In short: Analogue infrared photography
Analogue infrared photography is always associated with a certain amount of trial and error. Exact filter factors cannot be given, it depends on the wavelength the filter passes and the intensity of the (sun) light.
With the Heliopan RG715, which I usually employ, I have learned to assume a factor of 32 to 64 (this is only one f-stop difference!) to calculate the exposure with analogue film. You can imagine that e.g. with the Ilford SFX (which has 200 ASA), even in bright sunshine long exposure times result which require a tripod, bracketing is also recommended. Experimenting is fun on the one hand, but on the other hand it can be a „pain in the ass“, since you use a lot of expensive film, especially with medium format.
Digital infrared photography

After sitting on the fence for a long time, I decided to buy an M10 Monochrome this summer. I have had the „original“ M10 from day one and had gotten so used to the feel of the slim body that I didn’t want to go back to the previous models (although they are still excellent cameras).
The high sensitivity of the monochrome sensors puts an end to the limitations of analogue films. Exposure can be controlled in real time in live-view mode, hand-held shots with short exposure times are suddenly feasible and all this considerably expands the range of possibilities!
At this point, a disclaimer: I have also been taking analogue photos for years and I do not see the M10-M as a substitute for the charm of real silver halide film. But as someone who loves black and white photography, I appreciate that the monochrome models provide me with uncompromisingly excellent image quality even where film simply cannot be used. It’s nice to know that the DNGs from the camera require hardly any editing (a few corrections to the tonal values are almost always enough) to achieve an aesthetically pleasing result.
Optical aspects

Infrared light has a different refractive index on optical glass than that of the visible spectrum. Most vintage lenses have an infrared mark for correction. It does not matter whether it is an SLR camera or not, because the filter is so opaque that it is impossible to focus. On all my AI-S-Nikkor-Lenses you can find the marking, on the Zeiss lenses for my Hasselblad 501c, on the Fuji GW 690 (the „Texas-Leica“), on my Plaubel Makina 67 and on all my Leica screw-mount-lenses.
Interestingly, Leica has at some point deviated from applying IR markings. Maybe they were unreliable, because the degree of correction depends on the filter. In analogue IR photography, therefore, one usually works with small apertures (f/8 or f/11) so that small inaccuracies are not noticeable.
Also with the digital M10-M the rangefinder is unusable for this reason. Possibly there is an exception with apochromatic lenses, as these are corrected into the near infrared range. I own the Apo-Summicron-M 75mm, after a few hand-held wide open test shots it seemed to me that the deviation was marginal. To confirm this statement, I would have to do a „serious“ sequence of tests from the tripod, which I have not yet come to.
Practical approach
Once you are aware of all these aspects, hand-held infrared photography with the M10-M is child’s play compared to the analogue version.
But you definitely have to go into a fully manual mode. Once you have a suitable subject in front of the lens, the first thing you do is activate Live View or use the electronic viewfinder. Personally I think the Visoflex is too bad (I say, Leica: why is it not possible to offer a state of the art EVF?).
Depending on the lens, you set an exposure time that is realistic for hand-held shots at the high resolution of the M10-M. With a 35mm lens, for example, I take 1/125s, i.e. almost four times the focal length as the reciprocal of the exposure time. This is the disadvantage of 40 MP.
Choose a relatively open aperture to avoid going through the ceiling with ISO values, mostly in the range of f/2.0 or f/2.8. Wide open (f/1.4) makes the vignette more obvious than in visible light, but I like that.
The camera’s internal light meter cannot measure through the IR pass filter, so turn the ISO wheel until you agree with the exposure. I usually end up at ISO 1600 to 6400, depending on the intensity of the sunlight and the reflection of the subject. The histogram is very helpful and slight underexposure is no problem to have some safety margin for highlights.
You have to focus with focus peaking. This is done with wide open to ensure that the greatest sharpness is optimally focused on the subject. Please note: The hard stop of the distance ring is useless, „infinity“ is in fact just before!
Stop down to the desired working aperture, recheck the composition of the picture again and release the shutter. Done.
Once again: This procedure and the recommended settings are relevant for hand-held shots, which are of great value to me because I don’t always have a tripod with me.
For the best possible picture quality you would work from a tripod, set a low ISO value, choose a small aperture (maybe f/8) and adjust the exposure time accordingly, which becomes comparatively long (at ISO 160 and f/8 this is in the 1/8s range).

Recommendation: The use of colour filters
One of the most attractive features of the Monochrom is the classic, artisanal way of working that is possible with the camera. The DNGs are incredibly flexible to edit, but this is hardly ever needed.
In contrast to digital black and white photography with colour sensors, most of the creative act does not take place in post-processing, but directly during shooting.
Digital colour images contain the channels for red, green and blue, which are used after conversion into a black-and-white image to create a tonal separation by means of suppression or amplification of a given channel.
For known reasons, monochrome sensors do not have colour channels. The photographer has only one way to achieve tonal separation: Through colour filters, which are otherwise used in analogue photography. This technical knack, however, is either unknown or forgotten by many people nowadays. High time to remember it!
Now it can be argued that the sensors (like modern black and white films) are panchromatic, i.e. they reproduce different colours with the same brightness values with slightly different shades of grey, but through the selective use of colour filters you can strongly influence the image result depending on the motif.
If you own a Monochrom and do not use this creative potential, you are giving away a large part of your possibilities, because there is no making up for this in post-processing.
Colour filters intensify the light in the same colour and weaken the complementary colour, in favour of an increased contrast and other effects of tonal separation depending on the filter colour.
It would be beyond the scope of this article to go into the special applications of filter colours. The most common filters are yellow (it can actually always stay in front of the lens), orange (I like to use it for landscape shots) or red (for „dramatic skies“). Image examples can be found in various posts in the rangefinder world, I don’t actually take any B/W photos in daylight without a filter. Filter glasses are available in all shades and colours, I have already mentioned the most common ones.
Recently Stefano Strampelli wrote to me about a special area of use for a blue filter. He employs it to „enhance“ fog, so to speak. I have to admit that I have not had any practical use for this colour so far, except to reduce the orange mask when photographing colour negatives.
Stefano has provided two links, in this first one there is a comparison picture with a blue and an orange filter, in the second one there is a photo series of a walk in foggy Frankfurt. The pictures are analogue, taken with Leica M6 and 35 Summilux or 21mm Super-Elmar on Kodak Tri-X. They are unaltered scans of the negatives as they came from MFL.
In analogue photography you have to consider filter factors. Depending on the colour, the incident light is weakened. Yellow with factor 2 „swallows“ an aperture, orange with factor 4 costs about two apertures and red with factor 8 costs nearly three.
The manual of the Leica M6 points out that the light meter does not measure correctly from and above filter factor 4. A film that has 400 ASA and where the ISO wheel of the light meter has been set accordingly should be set to ISO 200 with an orange filter so that the correct values for the 400-speed-film are measured.
With the M10-M I have observed that a similar phenomenon occurs with the red filter. I then set the exposure compensation about 1EV upwards, so that the automatic exposure control does not underexpose too much.
The knowledge of filter effects is „old school“ and can be easily acquired to improve the quality of the monochrome output.
Conclusion
For a long time I struggled with myself whether I should take the step to the M10-M or simply stay with silver-halide film, but in the meantime it is clear: The way of working is classic and satisfying because I keep full control and the possibilities to do black-and-white photography beyond the previous technical limits are enormous.
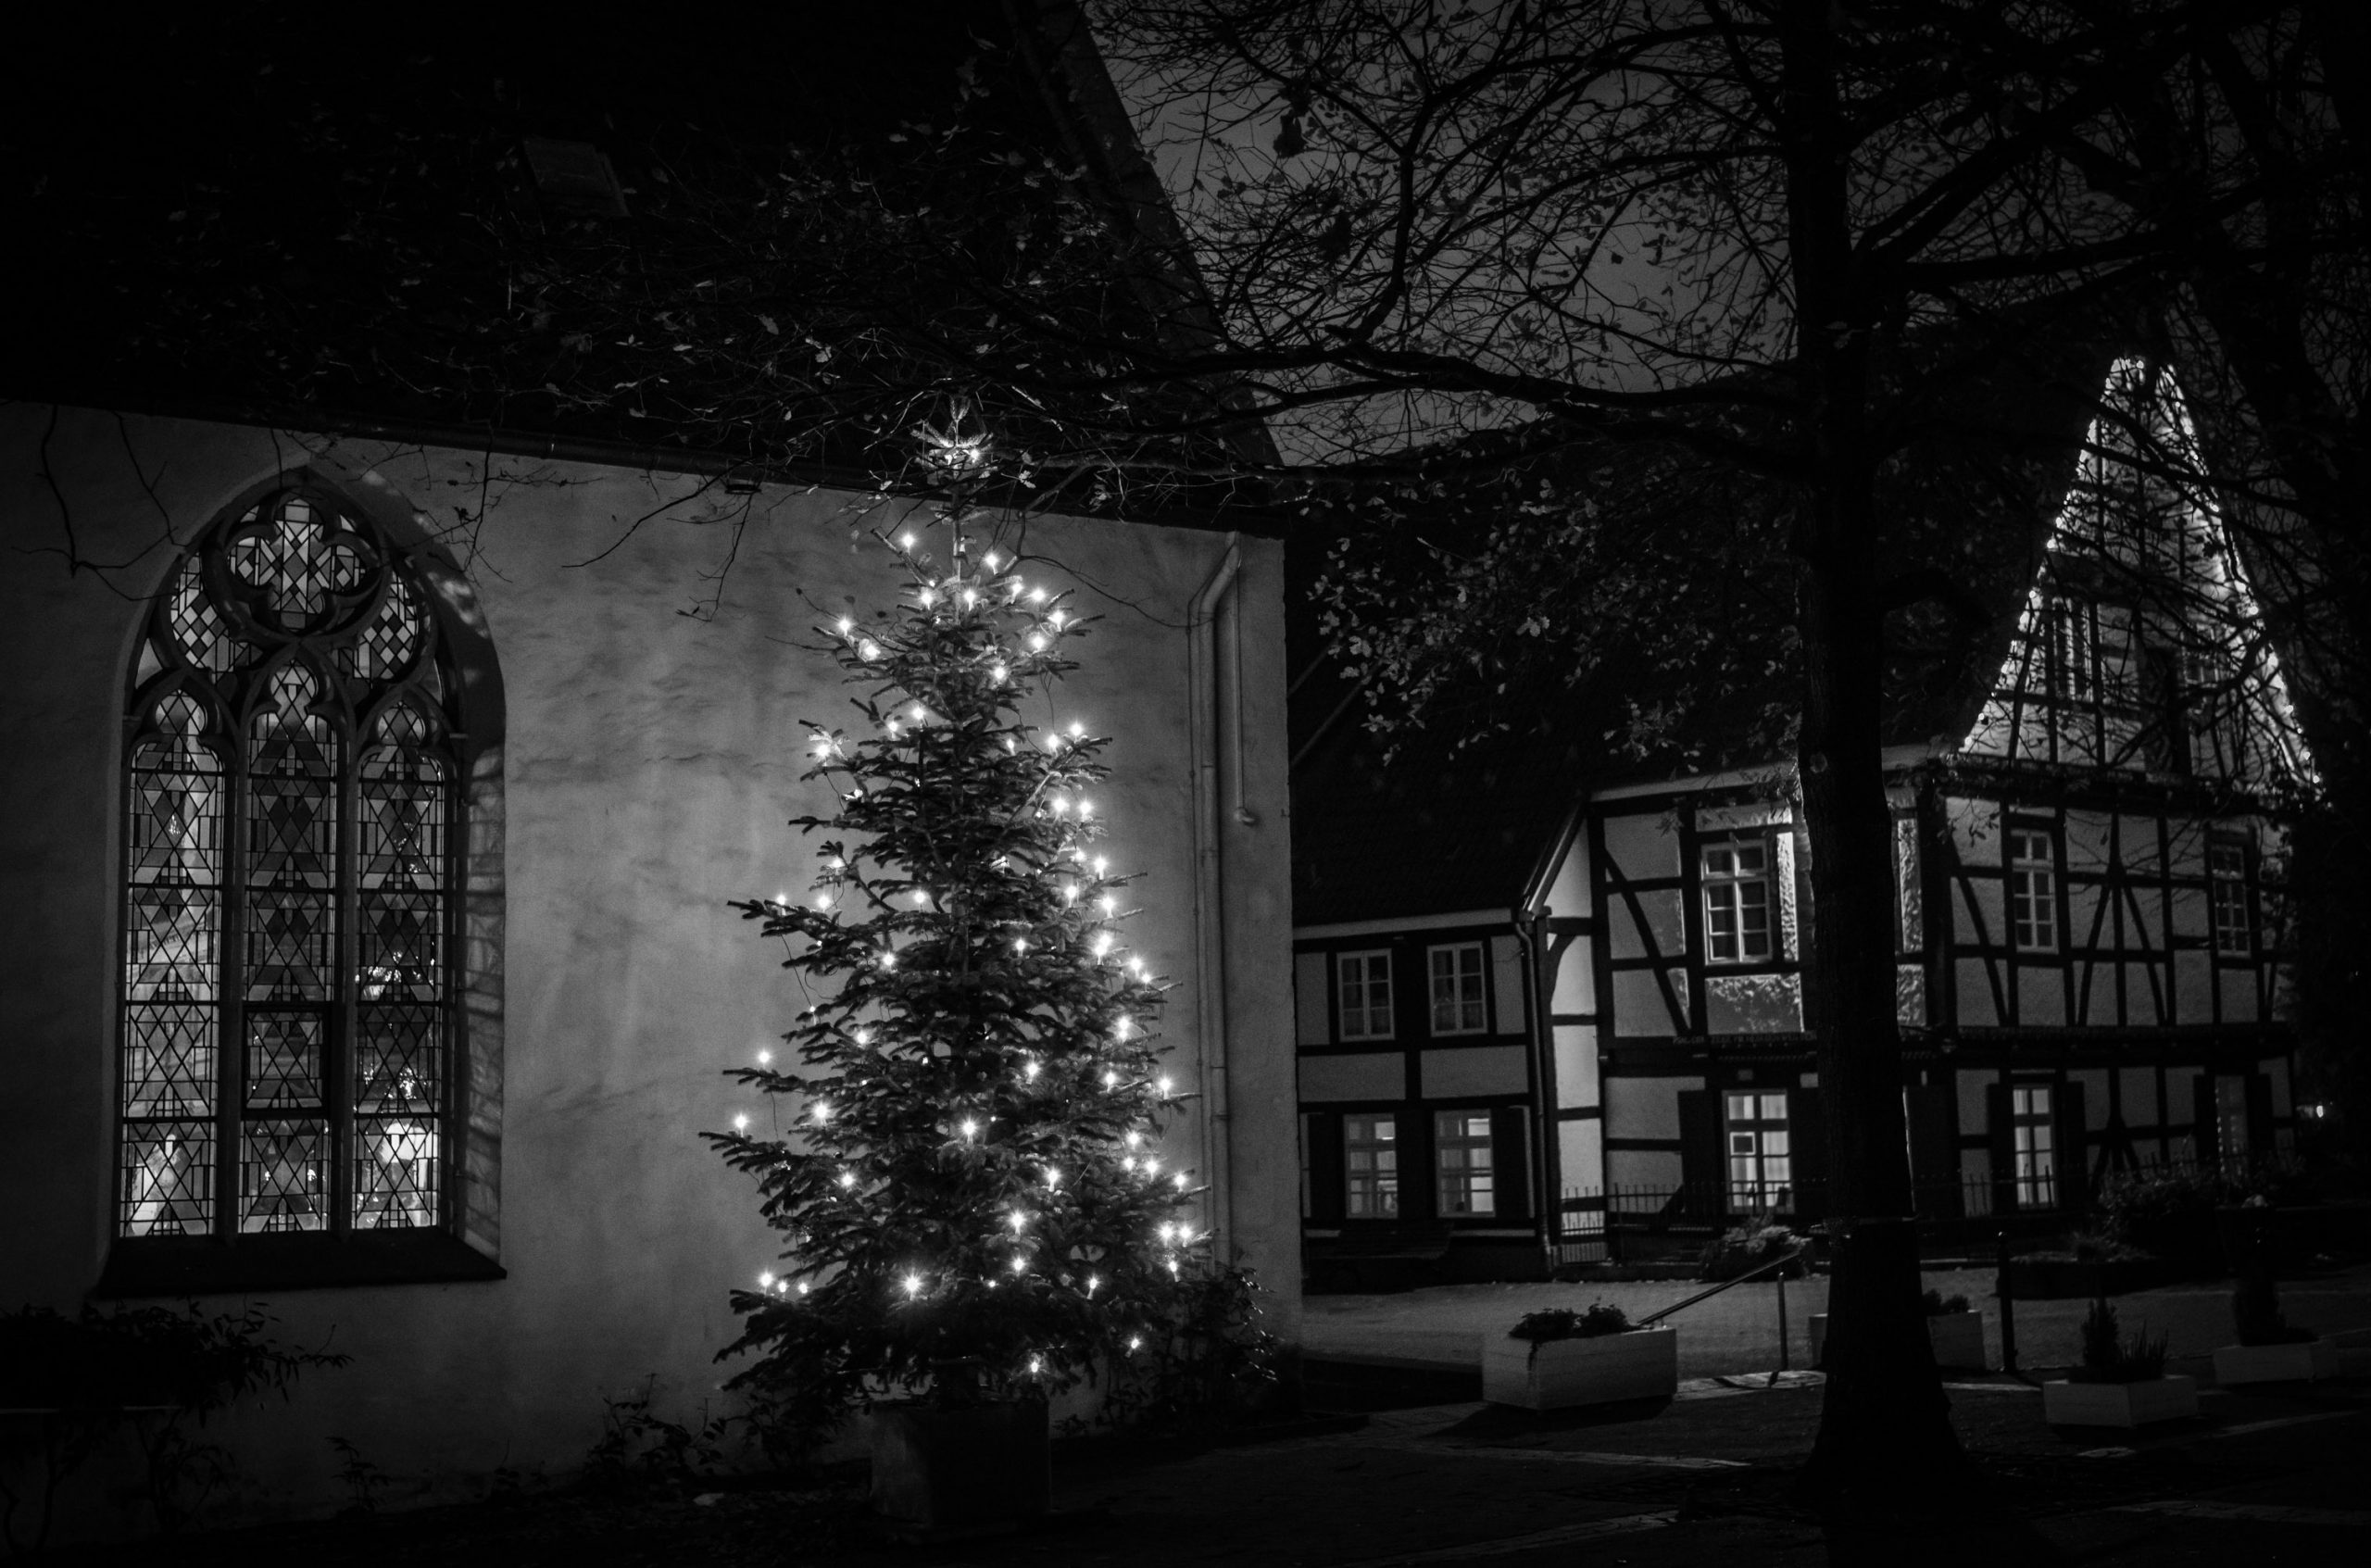
This is probably the last post in this strange year. Christmas will be very quiet for all of us. Personally, I especially miss the music. At this time of year, my choir usually performs large works by classical composers with orchestra and soloists, and there are a lot of small Christmas concerts as well, in which I am also often involved with my flute.
Now I am glad that at least on the 4th of Advent I play something in the service. I am still wavering between Bach, Manfredini or Corelli.
Of course we are lucky, we live in a country with no shortages. Look at the rest of the world, one really has to stop complaining. Nevertheless, I wish all readers a Merry Christmas and, above all, good health.
Guten Abend,
zunächst mal möchte ich mich für den sehr aufschlussreichen Artikel mit vielen tollen Bildern bedanken. Da es seit einiger Zeit die M11-M existiert, wollte ich mal nachfragen, ob diese Version genauso gut für IR-Fotografie wie die M10-M geeignet ist?
Viele Grüße
Ben
Hallo Ben,
normalerweise würde ich annehmen, dass IR-Fotografie mit der M11-M genauso geht wie mit der M10-M, bin aber vorsichtig mit meiner Aussage, weil ich das nicht selbst testen konnte. Beispielsweise ist das nicht ohne weiteres auf die Q Monochrom übertragbar, wie mir ein Leser berichtete (ich weiss leider nicht mehr genau, welche Q-M das war).
Viele Grüße, Claus
Hallo Ben,
Als die M11-M eingeführt wurde, gab es im Leica Store Beratungsgespräche mit der Möglichkeit, an einem Fotowalk teilzunehmen, um die Kamera auszuprobieren. Ich habe tatsächlich die gleiche Frage gestellt und die Antwort war, dass es nicht so gut geht wie mit der M 10-M.
Direkte Erfahrungen habe ich leider nicht. Ich besitze zwar eine M11-M, habe mich aber mit der M11 nicht versucht.
Viele Grüße
Stefano Strampelli
Hallo Stefano,
danke für deinen Input, sowas ähnliches habe ich mir nämlich gedacht. Vermutlich ist der IR-Filter vor dem Sensor der M11-M und der Q2-M stärker.
Viele Grüße,
Claus
Moin,
es ist Mitte 2022, Leica hat den Visoflex 2 im Angebot, hast du ihn schon ausprobiert für die IR Fotografie?
Ich habe ihn an der M10M ausprobiert und habe mich dazu entschieden weder den 020 noch den 2 zu kaufen.
Gruß
Mirko
Hallo Mirko,
für die M10 hatte ich nie einen Visoflex angeschafft. Wenn eine sehr definierte Bildkomposition erforderlich war, habe ich in den Fällen lieber den Monitor benutzt. Beim Visoflex 2 für die M11 habe ich zunächst gezögert, ihn dann aber doch angeschafft und zwar auch weil es von Anfang an hiess, er könne auch an der M10 (nach FW-Update) verwendet werden.
Und ja, ich benutze ihn an der M10-M bei IR-Fotografie. Da der Messsucher für IR unbrauchbar ist, und man das definitionsgemäß bei viel Sonne macht, ist das fokussieren über den Monitor der Kamera nicht optimal. Natürlich geht das – habe ich bis Dato schliesslich so gemacht, aber für mich ist sonnenklar (Wortspiel hier…), dass ich mit dem Visoflex 2 und der Vergrößerung müheloser und auch exakter fokussieren kann (Fokuspeaking schalte ich sowieso immer ab, es irritiert nur). Der Monitor ist da eine sehr viel schlechtere 2. Wahl.
Viele Grüße,
Claus
Hallo Claus,
ja, die M10M macht wirklich Spass im IR, gerade im Frühjahr, wenn die Blätter schiessen und die Chlorophyll-Produktion auf Hochtouren läuft. Da ich auch eine Q2M besitze, wollte ich das vor einiger Zeit entsprechend auch mit dieser Kamera machen. Dazu musste ich mir noch den Heliopan IR 715 in 49er Durchmesser besorgen… und los gings. Welch eine Enttäuschung, IR-Fotografie klappt mit dieser Kamera (mit diesem Sensor) leider überhaupt nicht, die Belichtungszeiten sind inakzeptabel lang, die Belichtungsmessung liefert immer viel zu dunkle Bilder, die dann auch noch extrem vignettieren. Ich habe das nicht weiterverfolgt und auch nicht nach den Ursachen geforscht (ich vermute einen sehr effektiven IR-Sperrfilter auf dem Sensor). Wollte das aber als „Warnung“ für Nachahmer hier gerne deponieren.
Puh, das hätte ich ja nicht erwartet! Auf jeden Fall Danke für die Warnung!
Ich hätte vermutlich blauäugig behauptet, dass das ebensogut wie mit den M-Modellen gehen müsste! Deine Vermutung mit dem „zu starken“ IR-Filter ist vermutlich korrekt.
Viele Grüße,
Claus
Ich Danke auch!
lese alle Artikel hier sehr gerne, da ich meine Werkzeuge kennen will.
Die Q2-M war schon länger auf der Liste, nun nicht mehr.
(… ich fürchte nur, das gesparte Geld geht bald woanders hin, wenigstens dann sinnvoller 😉
Hallo Claus,
hast Du schon mal Infrarotaufnahmen mit der „bunten“ M10 probiert?
Lt. Leica sperrt deren Infrarotfilter im Sensordeckglass bereits bei 670 nm 90%, aber das soll auch bei der M-Monochrom so sein… ?
Welche Chancen hätte ich mit der M10 und z.B. einem Hoya R72 Filter?
Schöne Grüße aus dem Emsland
Harald
Hallo Harald,
im Prinzip ist es möglich, ich habe das ausprobiert aber wieder verworfen. Die Ergebnisse reichten nicht mal ansatzweise an die aus der M10-M heran.
Und zwar aus folgenden Gründen: Der Bayer-Filter schluckt eine Menge Licht, dann ist die Auflösung durch die Bayer-Matrix geringer, der rote Kanal wird sehr stark gefordert und brennt gern aus (deutlich geringere Dynamik des Bildes), die hohen ISO-Zahlen wie bei der M10-M (und damit Bilder aus der Hand) sind auch nicht praktikabel (sonst noch weniger Dynamik).
Evtl. klappt es mit Stativ bei ISO 200, aber wie gesagt, trotzdem einige Abstriche bei der Bildqualität. Da ist eine M8 schon deutlich besser geeignet.
Insgesamt würde ich nicht sagen, „geht gar nicht“, aber wenn man von der M10-M verwöhnt ist…
Liebe Grüße aus Ostwestfalen,
Claus
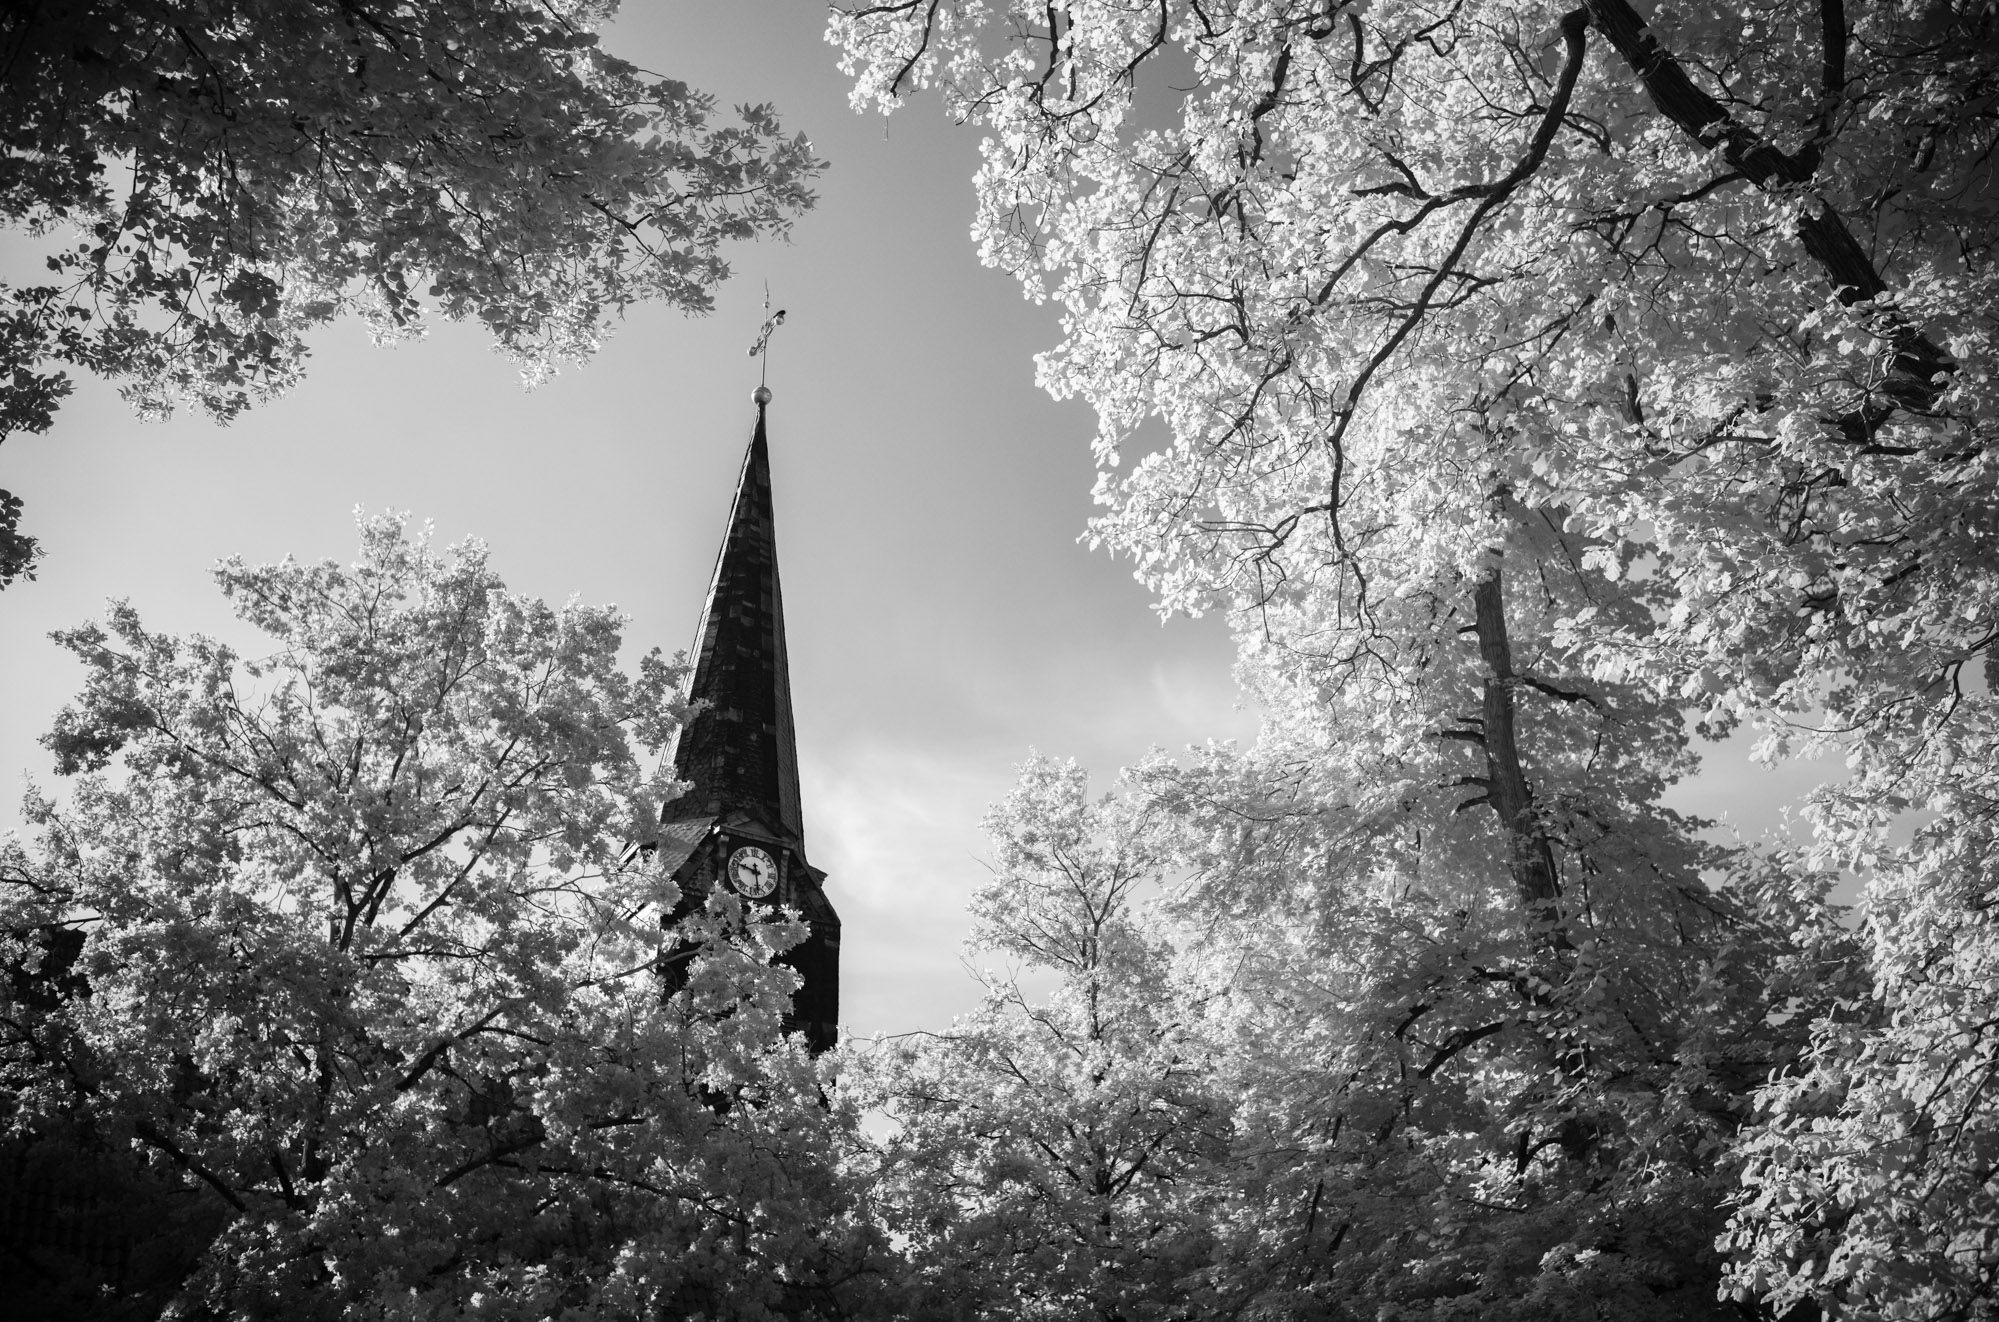
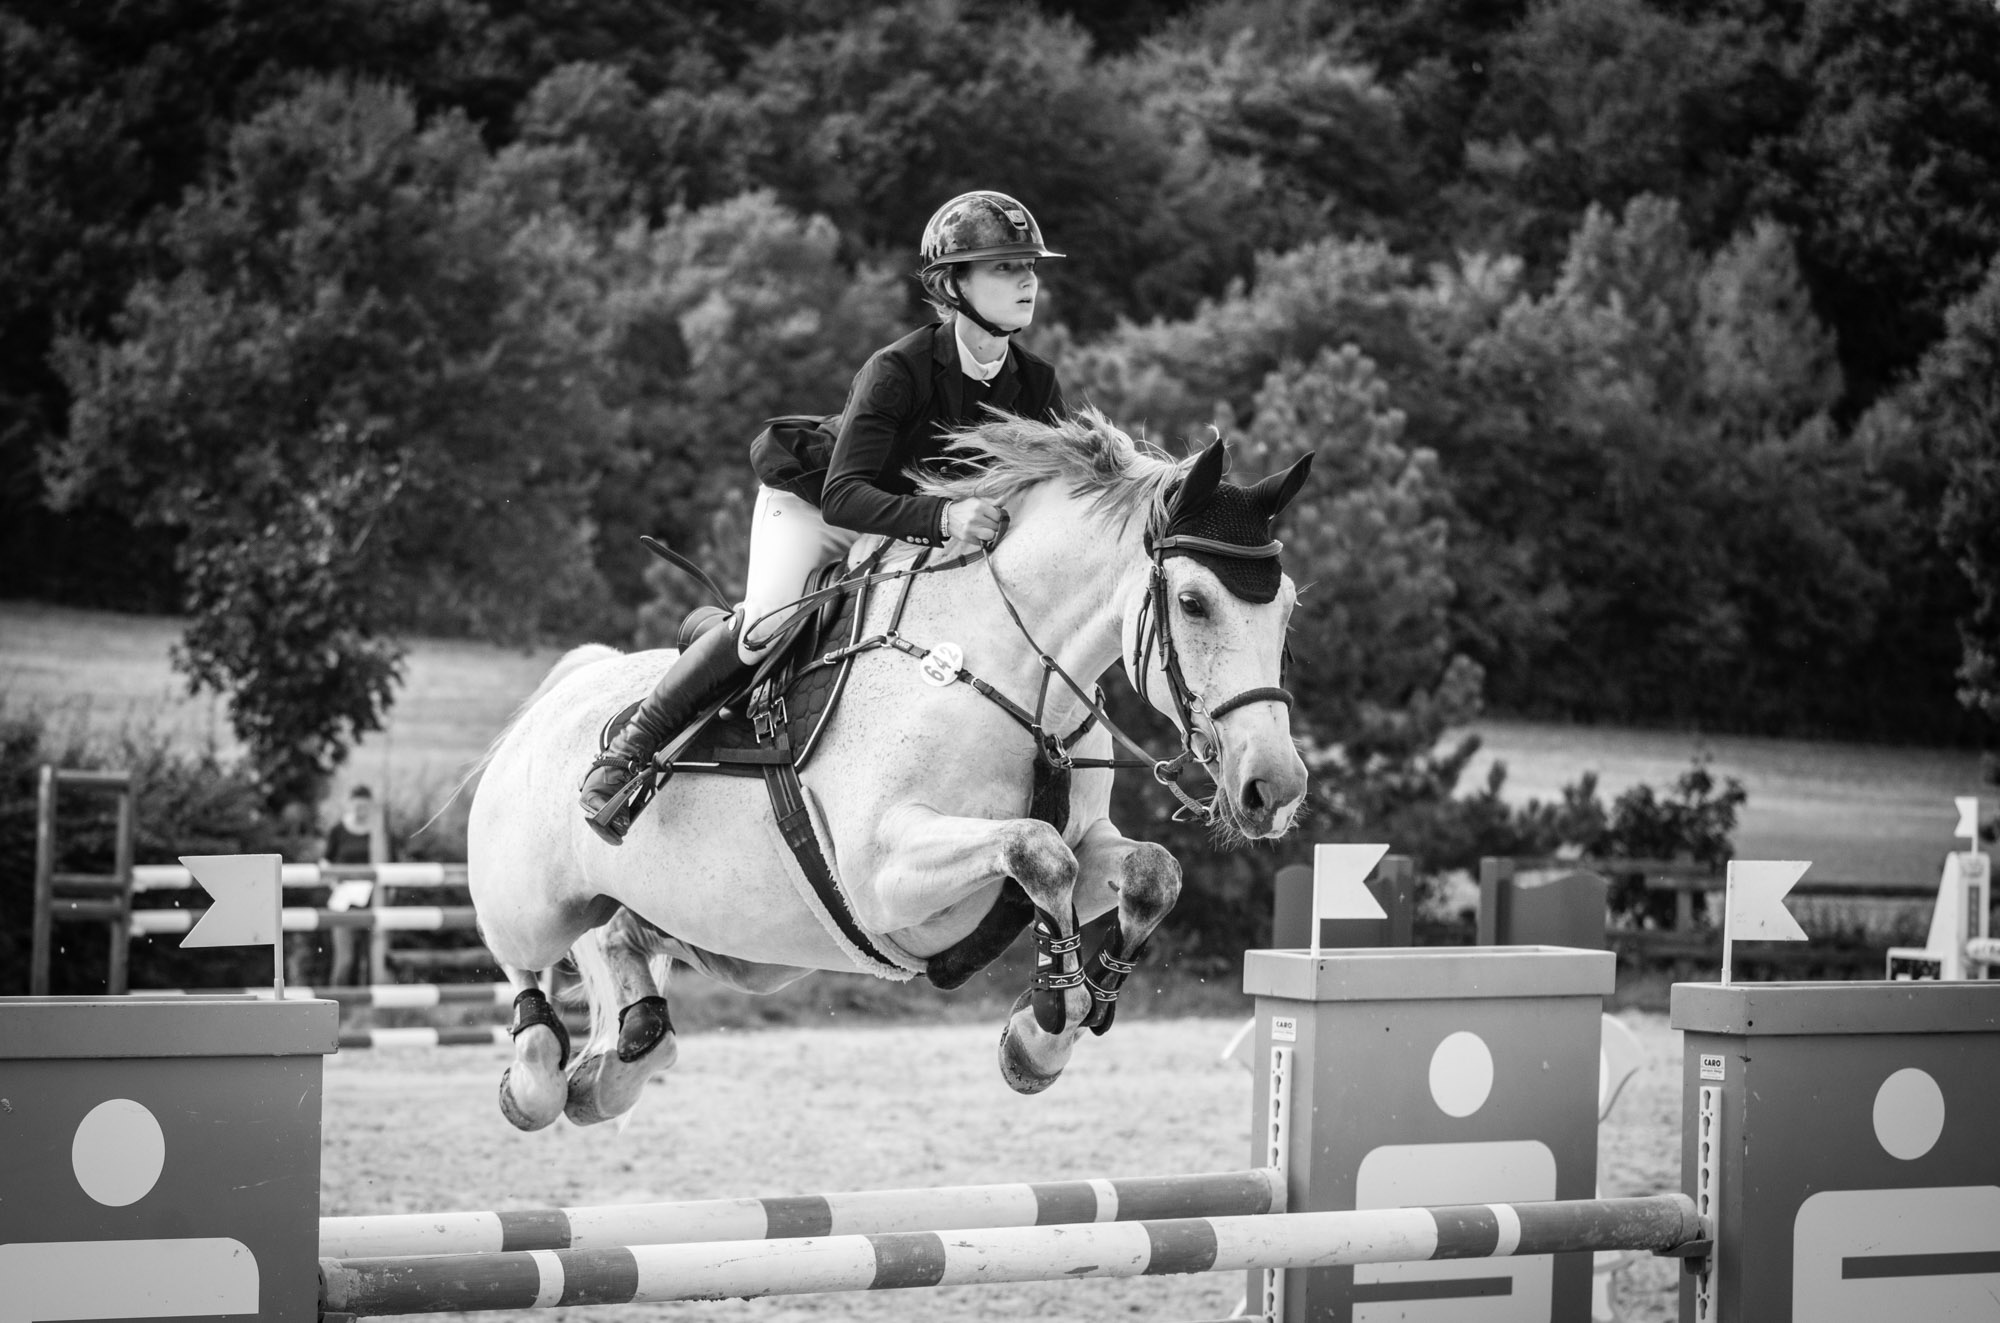
Lieber Claus.
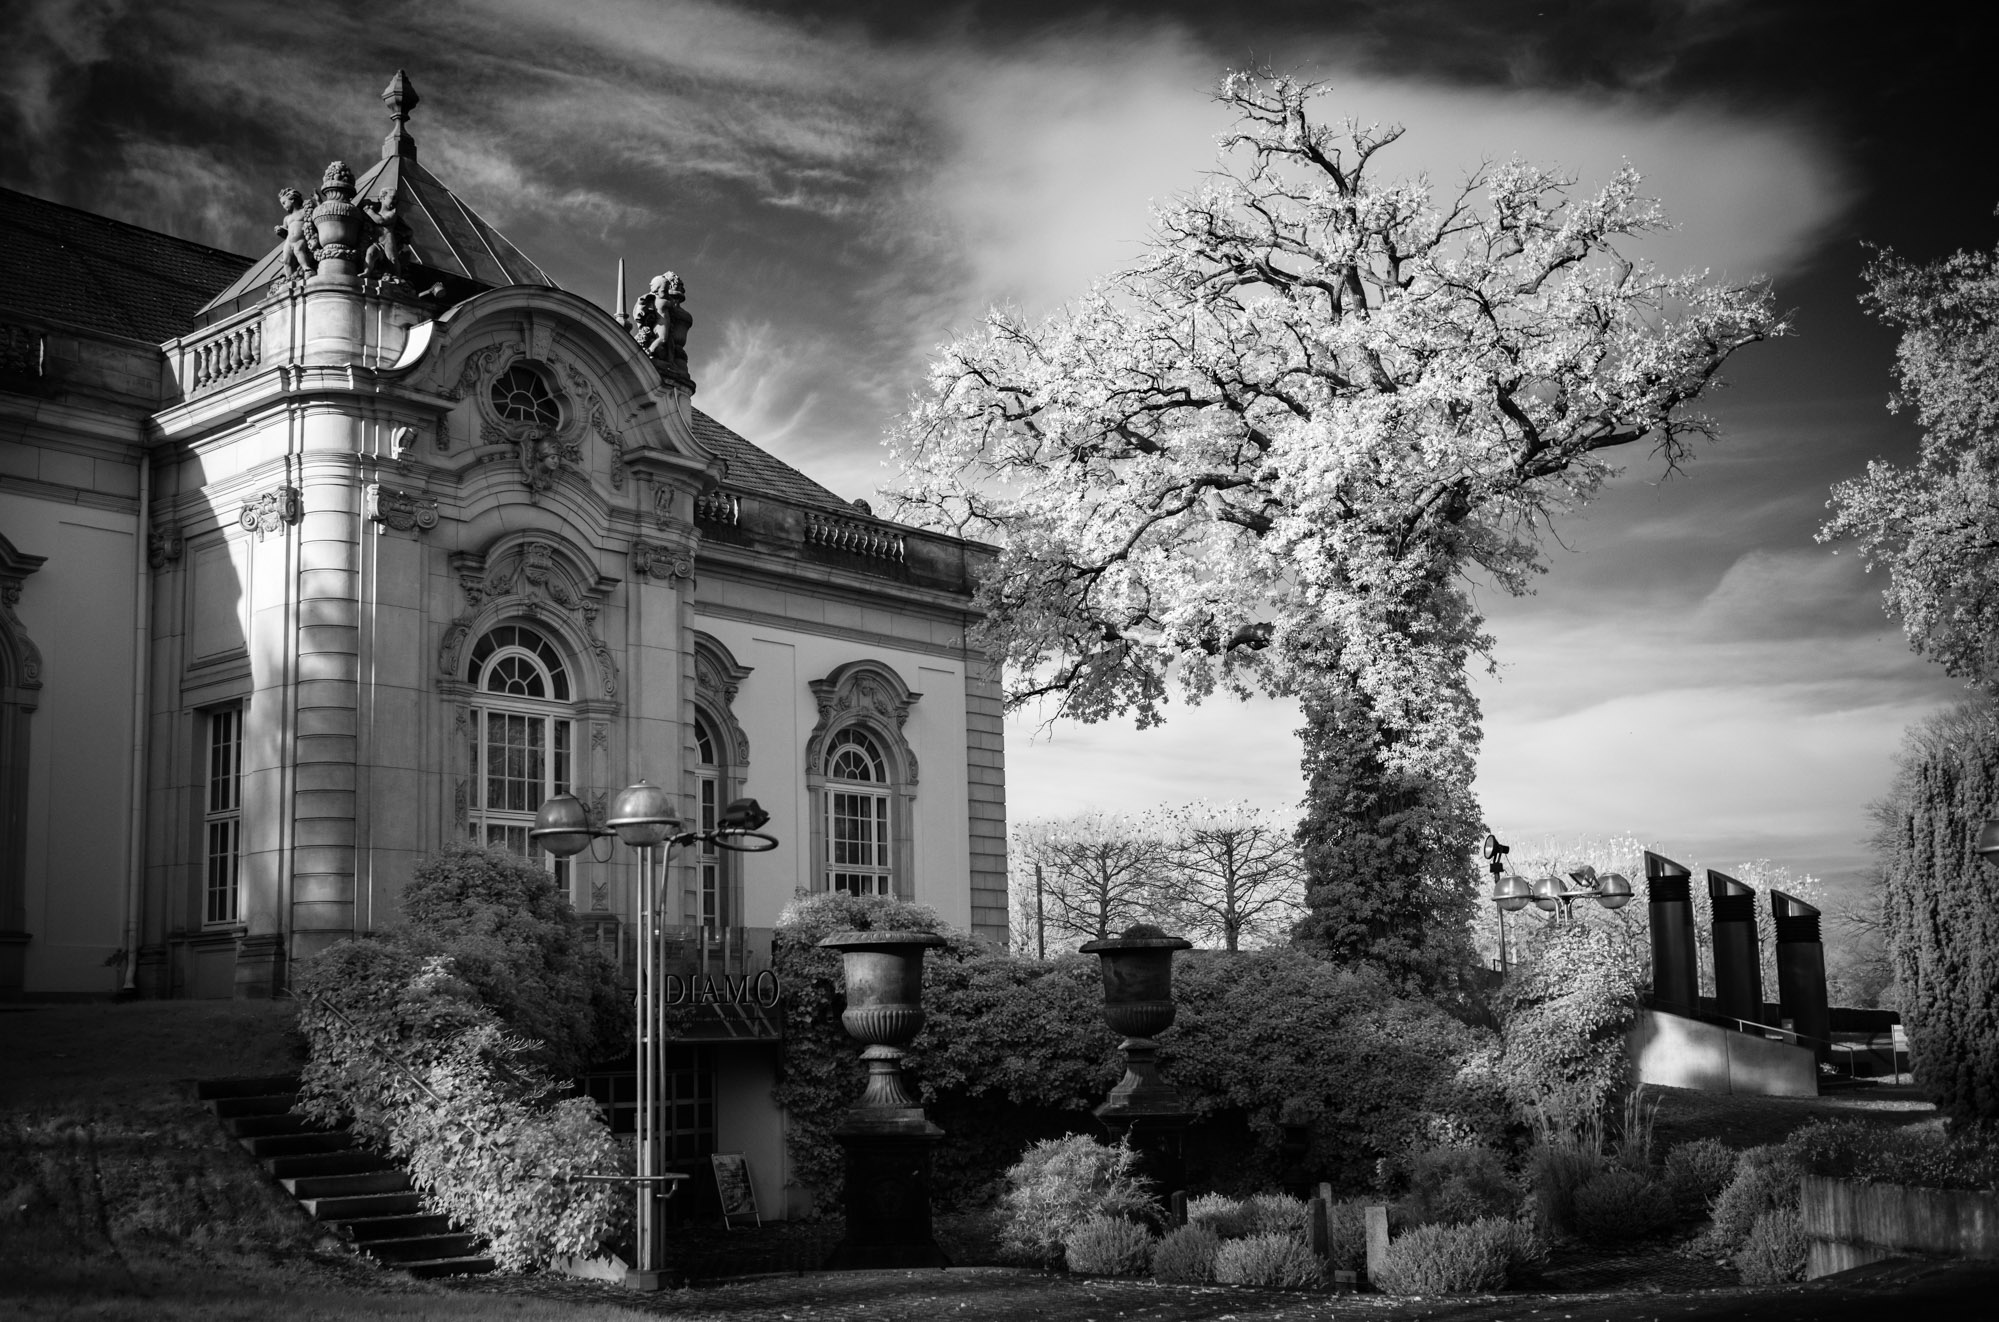
Ich nehme das letzte und wirklich berührende Bild dieses Artikels, um Dir und Deiner Familie in den auch für Euch sehr bewegten Zeiten ein besinnliches Weihnachtsfest zu wünschen. Ich möchte Dir danken für die Freude, die Du vielen Menschen mit Deiner Seite machst und für Deine Offenheit über Deinen Blog hinaus. Ich möchte Dir auch danken, dass Du Deinen Glauben nicht versteckst und die Messsucherwelt dazu nutzt, auf eine eigene Art zu zeigen, dass Glaube und Kirche ein wichtiger Bestandteil unseres alltäglichen Miteinanders sind.
Herzliche Grüße aus dem Norden.